Making cinder blocks with your own hands: instructions for making at home
Cinder block is one of the most popular building materials. It is made by the method of vibrocompression from a concrete solution. A wide variety of buildings are being built from cinder blocks - from sheds and garages to residential buildings.
Planning to build something out of cinder blocks? Make them yourself! There is nothing complicated in the production technology of these concrete blocks. You need to thoroughly understand the order of work, find out the basic requirements and withstand the recipe.
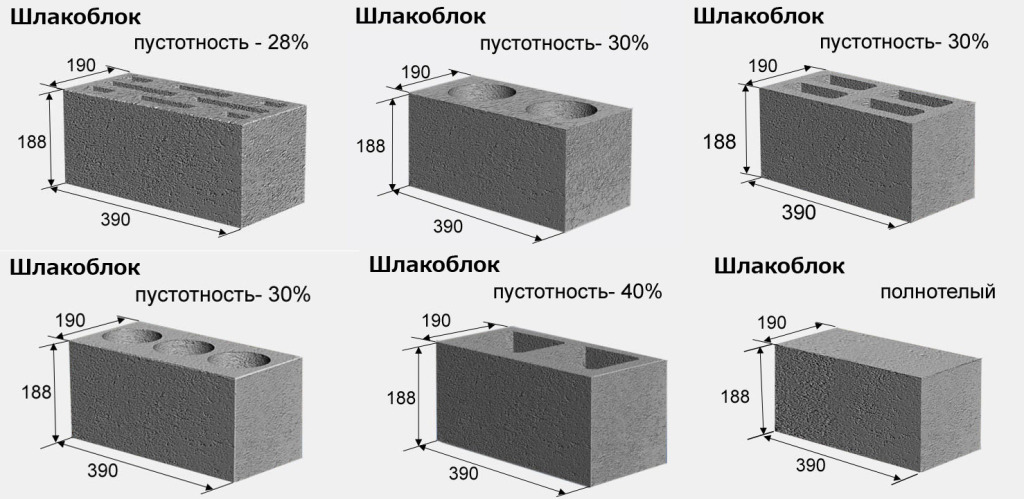

The dimensions of the cinder block are standardized - 188 x 190 x 390 mm. Each block has holes. Usually there are 3 of them. For the manufacture of building elements, a mixture of cement grade not lower than M400, blast furnace slag and coarse sand is used. Often additional fillers and plasticizers are added.
It is possible to make blocks both manually using molds, and using equipment with the function of vibrocompression.
On average, one bag of cement is enough to make 36 blocks. The savings are obvious.
The cinder block must have the correct geometry. Even small irregularities will lead to a deterioration in the quality of the masonry. To get even blocks, the forms need to be filled not just to the brim, but with a small slide, because. during vibration, the concrete will slightly shake and settle.
How to prepare a solution?
There is no universal composition of the solution for the manufacture of cinder blocks - each master has his own unique recipe. In general, it is necessary to focus on the features of the composition of the slag.
| Components | Volume, l, per block | Dry block compressive strength, kg/cm2 | Frost resistance of the finished block, cycles | The coefficient of thermal conductivity of the finished cinder block |
|---|---|---|---|---|
| Slag up to 8 mm | 10 | 30-40 | 30 | 0.35-0,4 |
| Sand up to 3 mm | 1,8 | |||
| Cement | 2,75 | |||
| Water | 1,5 |
There is a standard "factory" recipe, you can focus on it. The proportions are as follows:
- slag - 7 parts;
- sand - 2 parts;
- cement - 1.5 parts;
- water - 1.5-3 parts. More details about determining the required amount of water will be discussed below.
Helpful advice! Previously, the standard dimensions of cinder blocks were given. However, for private development it is more convenient to use products with dimensions of 400x200x200 mm.
In addition to slag, such blocks can include ash, sawdust, gypsum, broken bricks, coal combustion products, gravel and other similar materials.

Pay special attention to determining the required volume of water. It must be added so much that the products do not spread after formation.
You can do a simple test. Throw a handful of the solution on the ground or other surface. If it crumbles, but when compressed back by hands, it reunites into a single mass - the consistency is optimal.
Making cinder blocks by hand
If not too large-scale construction is planned, blocks can be made without a vibropress.
We make a form

We collect the form with dimensions of 40x20x20 cm. If you wish, you can adjust the dimensions at your discretion. For the manufacture of molds, we use metal sheets or wooden boards.
The design is extremely simple: bottom and side walls. We fix the walls taking into account the selected width and length of the block. The height of the form faces must also correspond to the planned height of the building elements.
Helpful advice! You can make molds with cells for the simultaneous production of 4-6 blocks - very convenient. It is only necessary to increase the length and width of the outer faces and install partitions between them.
Prepare empty glass bottles. You will use them to create voids in blocks.

Pour blocks
Pour the solution evenly into the mold to the brim.

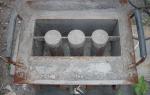
We place the bottles with the neck up in the poured mass. Level the surface of the fill, removing excess mortar.

We wait about 5 hours and get the bottles. We leave the cinder blocks in the forms for a day, after which we carefully take them out and lay them out on a horizontal surface in piles.
We leave the blocks to dry for a month. Only after the specified time, the material can be used for construction.

Helpful advice! During drying, cover the blocks with plastic wrap. It will protect products from cracking during the heat and will not let them get wet in case of rain.
We make cinder blocks on the machine

The machine allows you to significantly increase productivity. The equipment has a fairly simple design.

We assemble the machine
The main element of a home-made vibrocompression machine is a form (matrix) for cinder concrete mortar. By design, this form is a metal box with internal elements in the form of voids. The void spacers can also be removable.

Work set includes the following materials and tools:

First step. We make a form according to the size of future blocks. We cut out the side faces of the matrix from sheet steel. We will make the form immediately for 2 blocks. To do this, we cut out the inner central partition from steel and fix it in the box.
Second step. Determine the height of the elements for the design of voids.
Important! In accordance with the technology, the height of the voids should be such that the bottom wall has a thickness of 3 cm or more.
Third step. We cut off 6 pieces of pipe along the length of the restrictor cylinders to form voids.
Fourth step. We give the pipes a conical shape. To do this, we cut each piece of pipe longitudinally to the middle, crimp it with a vise and connect it using a welding machine. each cone on both ends.
Fifth step. We connect the limiters in a row along the long edge of the cinder block. We add along the edges of the row along a plate of 3 cm thickness with holes for fastening with eyes.
Sixth step. We make cuts in the middle of each such compartment. From the reverse side of the form we weld the eyes. They will allow temporary fastening of elements to create voids. A very convenient solution - it will be possible to remove the cylinders and make monolithic blocks.

Machine for cinder blocks compact (press from above)


Seventh step. Outside one of the transverse walls, we weld 4 bolts for the mounting holes of the vibration motor.
Eighth step. By welding, we attach an apron and blades along the edges from the loading side.
Ninth step. We prepare all structural elements for painting - we clean them and carefully polish them.
Tenth step. We do a press. It will look like a plate with holes that repeat the location of the holes in the block.
Important! The diameter of the holes on the plate should exceed the same parameter for the recesses in the block by about 0.5 cm.
We make the plate of this size and fix it in such a way that it can go deep into the box at the place where the limiters are installed by 5-7 cm.
In conclusion, it remains to weld the handles to the press, cover the structure with a primer mixture and mount the vibration motor.
An ordinary electric motor can be turned into a suitable vibration motor. To do this, it is necessary to weld eccentrics to the motor shafts. We won’t bother much - we’ll just weld the bolts so that their axes coincide. To regulate the frequency and strength of vibration, we wind the nuts onto the welded bolts.


Making blocks
Recommendations for the preparation of the solution were given above. You can use the standard recipe or modify it to your liking. The main thing is to get optimal viscosity. It can be determined "by eye" - a lump of the mixture must hold its shape steadily.
Before loading the mixture, lubricate the contact metal planes with oil. Due to this, the solution will not stick to the iron.
We put the finished mixture in the matrix and proceed to pressing.
We install the filled forms on the vibrating plate and let it compact the solution for 5-15 seconds. After the specified time, add more solution to the form, because. previously loaded will inevitably settle.
We repeat the process, only this time we do not turn off the vibrating plate until the clamp reaches the limiters. We remove the form until the machine stops.

We give the blocks 1-3 days for primary drying, carefully remove them from the blocks, lay them out on a flat horizontal surface and cover with plastic wrap. You can use the material for its intended purpose no earlier than a month later.

Successful work!