How to build a summer kitchen with your own hands? Summer kitchen open and closed
For a pleasant and at the same time useful pastime on the site adjacent to the country house, you must have a summer kitchen.
With its help, you can not only relax outside the home, but also realize many culinary ideas both with your family and with good friends.
But how to build a summer kitchen with your own hands? Let's take a look in this article.
Choose the type of building
Before you start creating a construction scheme, according to which you will have to calculate all the necessary material, you need to decide what the summer kitchen will be like: open or closed. It depends on the seasonal use of a building of this type. If such a structure is being built in a summer cottage, where the owners plan to visit only in the summer, then an open-type kitchen is quite enough. If we are talking about permanent residence in a country house, then it is best to build a closed-type summer kitchen.
Advantages and disadvantages of building types
Open buildings have the following advantages:
– minimum costs for arrangement and the shortest construction time;
- the possibility of installing a brazier indoors;
- more comfortable conditions for cooking outdoors during the hot season.
 Their disadvantages include the following factors:
- the possibility of using only at a comfortable ambient temperature (as a rule, this is the second part of spring and summer);
- complete lack of protection from wind, rain, dust, unpleasant odors and various insects such as flies and mosquitoes;
- the inability to leave food at night, as they can easily become the prey of neighbors' cats or dogs;
- at the end of the season, you will need to remove all the furniture in the house so that it does not deteriorate from the effects of various precipitation and air temperature in the cold season.
 As for the advantages of closed-type buildings, they include:
- maximum protection against flies, mosquitoes and bad weather conditions;
- the possibility of arranging an additional functional room (for example, a cellar or a small bathhouse);
- when creating an autonomous system of individual heating in such a kitchen, you can live at any time of the year;
Read also: Railings (railings) for balconies: selection and installation
 - in such a structure, you can leave not only food, but also furniture for a long time.
The disadvantages of a closed-type summer kitchen are:
- high costs for construction and arrangement;
- construction is characterized by the presence of complex stages of work;
- there is a need to draw up a project and various calculations for the purchase of a sufficient amount of material and its subsequent installation at the intended place.
Having carefully considered all the pros and cons and having made a final decision regarding the type of summer kitchen, you can proceed to the next stage of work.

Choosing a place for the construction of a summer kitchen
1) for an easier supply of communications, it is necessary that the distance from the house to the summer kitchen is small;
2) near the building, the presence of various sources of unpleasant odors is unacceptable (they can be a garbage pit, cages with rabbits, etc.);
3) in the case of arranging an open-type building, a place far from the road will be the most suitable (this will be protection from dust and unnecessary attention of people passing by).
After choosing a place, it is necessary to draw a drawing of the future structure and carry out all calculations.

Summer open kitchen
The simplest version of the construction of such a kitchen can be performed similarly to the arrangement of a large gazebo.
To create a foundation, it is necessary to mark the site and remove soil over its entire area to a depth of about 200 mm, while simultaneously supplying a water supply pipe and draining sewage. Then the resulting recess is filled to its full height with sand mixed with rubble and rammed with the addition of water (it can be brought in a watering can or brought with a watering hose). At this stage, it is necessary to perform wells with a depth of about 500 mm in the corners of the future structure to install corner posts in them, followed by their fixation with concrete during pouring.
 A formwork of even boards is installed along the perimeter, fixed with pegs and set horizontally in level (in this case, the boards can be used as pouring guides). This will contribute to the creation of a perfectly flat surface of the future floor.
Reinforcement is laid over the entire area of \u200b\u200bthe site allotted for construction, placing its individual rods perpendicular to one another so that square cells with a side of about 200 mm are formed. After that, they are connected with wire using a hook and concrete is poured, leveling its surface with a long rule along the upper edges of the formwork. Immediately before the start of concrete work in the wells, it is necessary to install the side posts vertically in level and fix them with spacers, having previously covered the lower ends of the posts with a layer of waterproofing. This will help increase their service life.
Read also: Pool waterproofing: types, stages of work
 The total curing time for concrete is at least three weeks. This time can be used to prepare various blanks for arranging the frame.
When the concrete hardens securely, the top trim is attached to the corner posts, a slope is created for the shed roof, the crate is mounted and roofing material is laid, which can be roofing paper, polycarbonate, etc.
If necessary, you can make small bumpers from OSB boards, moisture-resistant plywood and other suitable materials.
On this, the construction of an open summer kitchen is considered completed. Now you can safely proceed to install the stove, sink, table, chairs and other necessary furniture.

Construction of a closed summer kitchen
If, nevertheless, a decision is made to build just such a type of structure, then you need to be patient. To get started, browse existing projects on the Internet and select the most suitable option. If certain knowledge and skills are sufficient to complete all stages of work, you can safely proceed to construction. Otherwise, you will need to seek the advice of specialists.
Borrowing ideas from the selected project, they draw up a detailed construction plan. Consider the material from which the walls will be built. It can be a brick, various blocks, a wooden or metal frame, etc. (the frame then needs to be sheathed with boards).
 The type of foundation depends on the material of the walls. For example, for bricks or blocks, you will need a solid tape, and for a frame, a foundation in the form of a monolithic concrete slab will suffice, the arrangement of which can be done following the same recommendations outlined when performing a similar stage of work during the construction of an open summer kitchen.
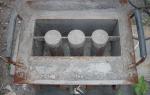
Consider, for example, the arrangement of a strip foundation. To begin with, along the perimeter of the future building, they dig a trench of the same depth (approximately 500–600 mm). It is important that the walls of the pit are even. Sand mixed with crushed stone is laid at the bottom of the formed recess (the layer thickness should be approximately 150 mm), watered and tamped. After that, formwork is installed from boards, a frame is made of reinforcement, it is installed around the entire perimeter of the trench and poured with concrete, covering it with a film upon completion of all work. This will help protect against premature evaporation of moisture from the foundation when direct sunlight hits its surface.