Incubation of chicken eggs - mode
Hatching eggs in incubators has long ceased to be something unusual and even more difficult. Both beginners and experienced farmers confidently master and use incubators to produce chicks throughout the year. Incubation requires compliance with a number of rules and subtleties, which we will discuss in detail in this article.
Incubation is a complex process, where it is critical to maintain the required temperature and humidity levels.
- Too high a temperature will lead to accelerated development of the embryo. As a result, the brood will be small, and such chicks are often born with an ungrown umbilical cord.
- If the temperature is lower than necessary, the chicks will appear a day later, as the cold slows down their activity. Significant deviations often lead to the death of embryos.
The same goes for humidity.
- The dryness of the air causes the loss of mass by the chicks, as the air chamber grows in size. This is fraught with early biting.
- Too high humidity leads to the fact that chicks often grow skin and beak to the shell.
Empirically, clear humidity and temperature indicators were derived for each of the incubation days.
Important! It is worth considering the possible temperature error of household incubators - it can be different in different parts of the container.
Baths with warm water will help maintain the required humidity. Humidity is regulated by a container with moisture, or rather the size of the open area from which water will evaporate. In small incubators, humidity rarely exceeds 60-63%.

Chicken eggs for the incubator
- hatching egg requirements
Eggs must be carefully selected. Farmers have long formed a clear list of indicators to be guided by.
One of the most important indicators is the health of the bird that laid the hatching egg. The chicken should not suffer from infectious diseases, otherwise the money for buying eggs will be wasted. The age of the bird should be from 1.5 to 2 years.
Important: pit is better to buy eggs in private farms and for birdsfactories with a good reputation!
Let's look at the other criteria that you should pay attention to.
- Shell Features
Divorces and spots indicate that the embryo may develop worse.
- Shape and size of eggs
Elongated eggs, as well as pear-shaped ones, are not suitable for incubation. Any deviation from the norm is considered a sign of a genetic anomaly, and a chick hatched from such an egg is likely to be sick. 
- Candling
Candling is a simple and effective method for checking egg quality.
With an ovoscope through the light, you can see any defects - from cracks and growths to depressions and pimples. These defects are a signal for the need for rejection.
- It is not allowed to place eggs with cracks in the shell in the incubator. Moisture will leave through it, which will inevitably affect the development of young animals.
- Required to reject eggs with thickening in the middle part of the shell, as well as with any roughness.
The ovoscope also allows you to view the air chamber. Her condition indicates how fresh the egg is. It is easy to recognize it by the spot at the blunt end of the egg.
- In young eggs, the air chamber is significantly smaller. In the case of a large chamber, the risk of lagging behind in development of chicks increases significantly. The optimal size of the air chamber is from 2 to 2.5 cm. At the same time, it should be located exactly in the middle at the blunt end.

Make sure the yolk is centered. Turn the egg - if it has shifted to one end, then the cord is torn. Such an egg must be rejected. Do not take eggs with mixed and torn protein.
- Collection rules
It is important to select from nests every two hours, but no more, otherwise the chickens begin to stomp and can damage the shell. In this regard, you need to take the egg from the nest very carefully with two fingers, holding it by the blunt and sharp ends.
- Disinfection
To clean the shell from contamination, use a rag soaked in a solution of potassium permanganate. For disinfection in the case of large batches, formaldehyde vapor is used. 25-30 ml of the substance is mixed with water in the same volume, then 30 mg of potassium permanganate are added.
This composition is sufficient to process one cubic meter of the incubator.
- The container with the composition is placed in a disinfection chamber with eggs, where they are treated with formaldehyde emitted gas. For the camera, you can use a tight-fitting box or cabinet without openings.
- It takes about 30 minutes to process. Wet disinfection with 25-30% bleach is also practiced. 15-20 g of the substance is needed per liter of water. Eggs before laying are placed in the solution for 3 minutes.
- Storage
Storage is carried out vertically with the blunt end up. Prepare for storage in a clean dry room with a temperature of 18-20 °C. If the eggs are left for a long time, the temperature will need to be lowered. Humidity is maintained at 80%. You can store no more than 6 days, but the optimal period is no more than 2 days.
Important!For storage, you can usewad store paper cells. This is a convenient and inexpensive solution.
- Bookmark
The incubation process begins with a bookmark.
- You can do it at any time of the day, but many farmers recommend doing it in the evening.
- The eggs themselves, lying in a cold room, must be transferred in advance (several hours in advance) to a warm room.
- It is better to lay large eggs first, as the young ones will hatch later.
- After 6 hours - medium, after another 6 - the smallest. Such a bookmark scheme will allow you to get a simultaneous biting. It is best not to take small and large eggs for incubation. Although in practice, due to the size, not all are culled.
In no case should you wipe the shellbefore layingdamp cloth- this way you can damage the protective film that saves the embryo from viruses and bacteria!
VIDEO RELATED TO THE TOPIC OF THE ARTICLE
The general scheme of incubation is as follows:
- We pre-load the tray with eggs and leave it in a warm room.
- We prepare the incubator: we carefully disinfect it and heat it to a temperature of 37.6C.
- To treat the shell, you can use 1% hydrogen peroxide or a weak solution of potassium permanganate. Processing is carried out very carefully so as not to damage the shell.
- Lay the eggs in the tray with the pointed end down. Be sure to monitor the temperature and humidity, adjust them in time.
- Starting from 4 days, we ventilate the incubator.
- After 21 days, if everything was done correctly, the incubation process can be considered complete.
Incubation periods and temperature conditions
The incubation process is divided into four periods.
- The first one takes a week.
- The second is the next four days.
- The third is from the 12th day until that first peep of the unhatched chick.
- The final stage is the pecking of the shell by the chicks.
Below are the modes of incubation of chicken eggs.
Eggs before laying must be heated to room temperature (about +25 ° C).
Period 1
- For the first three days, it is important to maintain a temperature of 38C, starting from the fourth day, it must be slightly lowered to 37.6C.
- From the first to the tenth day, the humidity level should be about 60%.
- During the first four days, the eggs must be turned over at least six times daily. Incubators with a turn function are very convenient - they will eliminate the need for constant monitoring. If there is no such function, you will have to turn manually after an equal period of time. This will prevent the growth of the embryo to the wall of the egg and subsequent death.
Candling can be performed six days after the start of incubation to analyze the results. Everything goes according to plan if:
- The circulatory system and vessels are clearly visible and occupy about 2/3 of the yolk.
- The embryo is located inside the yolk in the germ plasm, so it is almost invisible.
- Vessels are full of blood.
After candling, eggs without a germ and with other defects are to be removed.
Period 2
- We set the temperature regime at 37.6C until the tenth day, then lower it to 37.2C.
- We maintain a humidity level of 60%.
- We turn the eggs twice a day.
In the second period, it is very important to provide the embryo with a sufficient amount of water, otherwise it may die. The body of the embryo is already quite large, the allantois closes at the sharp end of the egg.
Period 3
- The temperature in the incubator is maintained at 37.2C.
- Raise the humidity level to 70%.
- We still turn the eggs twice a day.
- There is a need to ventilate the incubator.
At the third stage, metabolic processes are activated, so it is very important to ventilate the incubator. It is necessary to continue candling and monitor the condition of the embryos.
After 18 days, you can see the embryo that fills the egg. In the light, you will see that the shadow remains only in the area of the air chamber. If there are no defects, it will take about 30% of the egg, and its borders will be curved with a tubercle.
Bird squeaks can be heard from under the shell. The babies at this time pull their necks, trying to reach the blunt end of the egg. So they try to break through the air chamber and the shell.
Period 4
- Set the temperature in the incubator to 37.2C.
- We bring humidity to 78-80%.
- If the technical capabilities of the incubator allow, then we set the ventilation to the maximum, increase the heat transfer.
- Ventilate the incubator twice a day for 20 minutes.
- No need to turn eggs!
During the final period, it is required to provide the birds with an easy peck. Eggs need to be laid on their side and create a maximum of free space between them.
By the nature of the squeak, you can understand how the chicks feel. If the sounds are calm and monotonous, then they are comfortable. If the chicks are cold, they squeak heavily and loudly.
Ready to hatch, the chick turns counterclockwise and pecks the shell. For healthy individuals, three strokes are enough for this. At the same time, their head is at the blunt end, and the neck is at the sharp one. The young press with their weight on the walls and break the shell.
The entire incubation process takes 20-21 days. All chicks hatch within a day. After that, the selection of young animals is carried out.
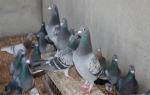
How to choose the right chickens
Healthy individuals are distinguished by strong legs and shiny fluff. They readily respond to sounds, their eyes are clear, slightly bulging, the beak is short.
Particular attention should be paid to the stomach. In healthy birds, it is not droopy with a soft umbilical cord. A slight increase in the abdomen, a little dull down and with unexpressed pigmentation, as well as a dried blood clot on the umbilical cord are not reasons for rejection.
Weak birds are destroyed immediately, as they have little chance of surviving. The hatched chicks are left in the incubator to dry out, after which they are transferred to the brooder.
It is very important to create the right microclimate for the embryos during incubation. They die mainly for two reasons - poor-quality eggs and violation of the incubation regime.
In this regard, it is very important:
- Even an automated incubator requires monitoring - a check should be done at least every 8 hours. Even by setting the parameters correctly, you will not be able to exclude the failure of equipment.
- Always place the eggs evenly in the tray when laying.
- If the incubation took place in a hot summer, the incubator must not be loaded by more than 80%, otherwise the embryos may die.
- Buy a hygrometer to help you keep track of humidity levels. An ordinary mercury thermometer will help measure the temperature on the surface of the eggs.
- After transplanting chickens, be sure to rinse the incubator, remove all remnants of the shell.
- Autumn is not the best time to hatch, but if you choose this period, irradiate the chickens with ultraviolet light to stimulate the production of vitamin D.
At first glance, hatching poultry may seem like a daunting task, but if you look into the details and follow a simple incubator setup scheme, the results will definitely not be long in coming.
The author of the article is Kristina Sekushina