You are the master of dpi. You are the master
Lesson type: Learning new material, lesson - creativity.
The purpose of the lesson: The development of artistic and aesthetic thinking of children through work with corrugated cardboard using the quilling technique. To form in children a sense of success, self-confidence, arouse the desire to constantly create, create a product of decorative and applied art to decorate the interior.
- Educational: Contribute to the formation of ideas about a new kind of arts and crafts - quilling. To form in children practical skills in working with paper using the “quilling” technique.
- Educational: To develop artistic taste, creativity and imagination of children, the ability to work with hands, improve fine motor skills of hands, develop an eye, develop spatial imagination.
- educators: Raise interest in working with paper using the “quilling” technique, improve labor skills, form a work culture, teach accuracy, the ability to carefully and economically use material, and keep the workplace in order.
Equipment for the teacher: PC, multimedia projector.
Equipment for children: strips of colored corrugated cardboard, PVA glue, toothpicks, cotton swabs.
Lesson plan (45 min.)
Organizing time. Check readiness for the lesson. 3 min.
Repetition of the studied material. front poll. 5 minutes.
Practical part. Corrugated cardboard quilling master class with a presentation. 30-32 min.
Final part. Summarizing. Exhibition of works. 5 minutes
Organizing time:
Greeting, checking that students have the necessary materials and supplies.
Repetition of the studied material:
In the last lesson, we talked about modern decorative art.
(View presentation)
Slide 2. - Let's remember what types of modern arts and crafts exist. What materials do the artists use? (Students answer - ceramics, art glass, metal, tapestry, batik.)
Slide 3. - That's right, and today in the lesson I invite everyone to become a master of arts and crafts and do voluminous work from corrugated cardboard to decorate the interior.
Slide 4. - For this we need the following materials and tools: strips of colored corrugated cardboard, PVA glue, toothpicks, cotton swabs.
Slides 5-6-7-8. Quilling - from the English word "wind". Quilling is the twisting of strips of paper or corrugated cardboard with a serpentine, which take on an openwork filigree look.
Skillful hands of craftsmen can make amazing products. Look.
Slide 9. - Let's get to work. Take a strip of yellow corrugated cardboard and twist it into a thin tube. Screw the tube into a coil-roll.
Slide 10. - Make exactly the same rolls from strips of corrugated cardboard of a different color. Then make a heart shape from each coil.
Slide 11. - Making a stem. Fold a green strip of cardboard in half, glue both halves, leaving room for a flower. Glue a yellow heart flower. Repeat the same with the other strips of cardboard.
Slide 12. - Making leaflets. Take a piece of green corrugated cardboard, cut it diagonally - we get triangular leaves. Let's do the same for the other flowers.
Slide 13 - Glue the leaves to the flower stems. Bend the bottom edge of the stems. Let's make a vase - twist the coil - a roll of a larger diameter, squeeze out the shape with our fingers, glue it inside. Glue the flowers into the vase. Fill the vase with “ground” - soft paper.
Slide 14. - Glue the “grass” on soft paper in a vase (cut pieces of cardboard).
Final part. Exhibition of works.
Guys, you are real masters of arts and crafts. Let's see what kind of work you've got.
(Students place their work on their desks.
Together with the teacher, the best are determined.)
Summarizing:
Today in the lesson we got acquainted with the quilling technique, I hope that you will continue to work with corrugated cardboard in this technique. I wish you all success.
This lesson is over. Goodbye.
Bibliography.
1. Bukina S. Bukin M. Quilling: the magic of paper curls. – “Phoenix”, Rostov-on-Don: 2011
2. Zaitseva A.A. The art of quilling: the magic of paper tapes. - M .: Eksmo, 2009.
3. Pishikova N.G. Working with paper in non-traditional techniques - LLC Publishing house "Scriptorium 2003", M: 2008
4. Pishikova N.G. Work with paper in non-traditional technique -2 - LLC Publishing house "Scriptorium 2003", M: 2007
5. Pishikova N.G. Working with paper in non-traditional techniques - 3. - M .: LLC Publishing house "Scriptorium 2003", 2008.

Lesson objectives:
1. Educational:
to acquaint with the decorative and applied art-mosaic;
improve the skills of drawing up a composition from colored paper;
create conditions for students to master the sequence of work in the mosaic technique.
2. Developing: to promote the development of creative imagination, artistic taste, color perception, visual memory, creative abilities;
to promote the mastery of the main ways of mental activity of students (compare, analyze, generalize, prove, explain concepts);
contribute to the development of the sensory sphere of students (development of the eye, accuracy and subtlety of distinguishing colors and shapes);
contribute to the formation of students' cognitive interest in the subject.
3 . Educational:
create conditions for the formation of aesthetic taste and work culture;
contribute to the formation of moral qualities of the individual.
Methodological equipment of the lesson:
Material and technical base:
Presentation made in Power Point;
Multimedia projector, screen, computer;
Didactic support:
reproductions;
work samples.
Teaching methods:
problem;
explanatory and illustrative;
reproductive;
partially search.
Forms of organization of cognitive activity of students:
frontal;
individual.
Vocabulary work:
mosaic, smalt.
IICourse progress.
Organizing time:
checking the readiness of students for the lesson.
Updating students' knowledge:
2.1. What do we understand by the word "mosaic"? (Finding the right solution).
Mosaic is an artistic image, a pattern made up of multi-colored small pebbles fastened together, pieces of painted glass. (“Explanatory Dictionary of the Russian Language”, edited by D. N. Ushakov).
2.2. To reveal the concept of "Mosaic" from the point of view of fine arts.
Recall five types of fine arts. (Painting, graphics, sculpture, architecture, arts and crafts).
Determine which type of fine art is closer to the mosaic and why.
Where in our city you can see mosaic paintings.
2.3. Generalization by students of the received data.
Presentation of new material:
Mosaic - a special kind of monumental painting, which is created from small multi-colored pebbles or colored opaque glass.
History of development.
Mosaic is one of the most ancient techniques of arts and crafts. Presumably, it originated in ancient Greece and spread to neighboring territories, wherever Greek colonies appeared. No less popular was the mosaic in ancient Rome. Suffice it to recall the textbook examples of beautiful mosaics discovered during the excavations of the city of Pompeii. In the era of the late Roman Empire, mosaics can already be found almost everywhere: both in private houses and in public buildings. For the most part, they finished the floor with it; when painting the walls, preference was given to frescoes. As a result, elegant and truly majestic spaces were born.
The emergence of mosaics in Russia is inseparable from the ability of representatives of the Slavic tribes living on the territory of Kievan Rus in the 8th-9th centuries to make glass. And not only the glass itself, but also a variety of glass products. Artisans have learned how to create mosaic smalts, which are glass transparent, translucent (or so-called muted glass) cubes or plates, the palette of which surpassed everything that existed before. Kyiv craftsmen have achieved unprecedented skill in the field of mosaic work. They set the bar so high that they surpassed the level of Western European masters! From now on, the mosaic of Kievan Rus has become a model of true art for the West.
In fact, it took Russia seven long centuries to, on the one hand, pick up the mosaic art of all countries and states (including Kievan Rus), and on the other hand, to raise it to unprecedented heights. This rise is associated with the name of M. Lomonosov - "the inventor of mosaics in the Russian Empire." He came up with an accelerated way to set the mosaic, improved the technique, freed mosaic art from frozen forms and restrictive traditions. In his workshops, samples of smalt were made, which had many shades of brightness and saturation. At least approximately similar did not occur anywhere else in that period. So in Russia there was a peculiar, inimitable, own mosaic, the Russian style of which - unique and original - was given by Lomonosov.
Roman mosaics were laid out from small cubes (pillars) of smalt (opaque and very dense - glass) or stone. Sometimes pebbles and small stones were also used.

Image of the Greek goddess of the sea Thetis.

Mosaic panel glorifying the exploits of Alexander the Great.


Portrait of M. Lomonosov.
Mosaic is also used to decorate works of arts and crafts: jugs, plates, bowls and other items. Glass mosaic is indispensable for facing: pools, waterfalls, fountains, bathrooms, kitchens, building facades.
Mosaic for facades of houses. Mosaic for swimming pools.


Mosaic for the bathroom.
Mosaic on dishes.

Mosaic can be done using fabric, from multi-colored pieces of plasticine, colored paper.
4. Fixing the material.
List the main materials used to create a mosaic.
What is smalt? Give a definition (as understood).
Who revived the smalt mosaic in Russia.
Practical work. Independent work (creative).
Work sequence.
- the work is done in the technique of colored paper mosaic;
-selection of a palette of colored paper according to the sketch;
- drawing up a mosaic from multi-colored pieces of colored paper;
6.1. current instruction. (In the course of work).
6.2. Target rounds.
Instructing students to perform individual operations and the task as a whole.
Concentration of students' attention on the most effective methods of performing operations.
Providing assistance to poorly prepared students for the task.
Rational use of study time by students.
7. Reflection.
Analysis of the performance of independent work by students.
What did you learn new? What kind of art did you get acquainted with in the lesson? What did you like in the lesson?
Why is it advisable to first work in a sketch, and then in the material?
Viewing works.
Marking. Cleaning the workplace.
Children's work


Krasnodar Territory, Art. Starominskaya
teacher of fine arts MOU secondary school №9
Grudyeva Natalia Alekseevna
Fine art lesson for grade 5
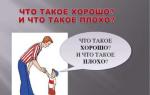
Are you a master of arts and crafts?
The purpose of the lesson: create a productdecorative - appliedart in modern style
Tasks:
introduce modern types of decorative and applied art;
introduce the new quilling technique;
cultivate love for the environment.
Technique: paper rolling
Type of lesson: Creativity Lesson
Equipment
For the teacher: presentation
For kids: sheet A4 colored paper, scissors, PVA glue.
During the classes
1. Organizational moment.
2. Main stage
1. Teacher's story.
Decorative art continues to live in the modern world, finds new means of expression.Modern artists boldly experiment with material, form, color, creating something completely new every time.
Today we will also be modern artists and get acquainted with a new technique - quilling.Images in quilling are created from strips of paper folded into different shapes and pasted onto a base, for example, on ... a postcard. Strips can be bought, but it is easier to cut from double-sided colored paper. You can wind it on an ordinary wooden toothpick. Form everything you need from a rolled up ball and glue on a sheet, make upvolumetric or flat compositions from the obtained parts. Using this technique, you can decorate almost everything that your imagination tells you: photo frames, greeting cards, various interior items. But you never know what can be done ... The main thing is that all products created by the warmth of human hands turn out to be beautiful, unusual and convey the mood of the author.
2. Exercise.
First, we will master the basic elements of the quilling technique.
Cut strips of different colors and try to wind the spiral.
Run a tight spiral, free and give it the shape of a drop, flower, petal. Work with the teacher.
Instruction
Take a strip of the desired color, length and width.
Wrap it tightly around the quilling tool.
Carefully remove the resulting roll (roll) and let it unroll a little.
Glue the outer end of the strip.
Give the element the desired shape by bending, pressing, pinching and sliding the paper with your fingers from different sides.
3. Safety briefing when working with scissors.
4. Practical part
Making your own work. Design a postcard, frame, make an original work (flowers, caterpillar, butterfly)
5. Analysis and results of the lesson.
What technology did you meet?
- What did you like the most?
Public lesson
in fine arts
"You yourself are a master of arts and crafts"
(Russian folk doll)
5th grade
Conducted by: Petrova E.V.
art teacher
art
with. Taptugari, 2018
The date: May 15, 2018
class 5
Teacher: Petrova Ekaterina Vladimirovna
Theme of the quarter: "Decorative and applied art in the modern world".
Lesson topic: "You yourself are a master of arts and crafts" (Russian folk doll)
Target: organization of productive creative activity of schoolchildren, aimed at mastering the ability to analyze, compare, evaluate the traditional doll as an element of national culture through mastering the methods of its manufacture.
Tasks:
Contribute to the formation and development of skills and abilities when working with threads.
Develop imagination, thinking, creative abilities of each child;
Contribute to the formation and development of student independence.
To educate moral and aesthetic responsiveness to beauty in the arts and crafts of the Russian people.
Planned results:
1. Personal results:
To carry out a value assessment and motivation for activities;
Carry out joint practical activities;
Analyze your activities;
Ability to listen to the teacher.
2. Subject results:
Understand the objective of the lesson and strive to fulfill it;
Learn how to work with a flap;
Apply the acquired knowledge and skills in practical activities.
Metasubject Results
1. Regulatory UUD:
Determine with the help of the teacher the topic of the lesson and its own goal;
Reveal your own problems;
Find ways out of difficulties;
Organize your activities;
Monitor and analyze your own activities.
2. Cognitive UUD:
Search for suitable information to achieve the set educational problem;
construct new knowledge;
Apply knowledge in practice;
State your opinion;
The ability to make simple generalizations and conclusions independently.
3.Communicative UUD:
The ability to conduct a cognitive dialogue on the topic of the lesson, to collectively analyze the product;
Be able to hear a friend, not interrupt him;
Know how to defend your position.
Methods and forms of education : story, explanatory and illustrative, practical, exhibition; individual, frontal.
Lesson type: a lesson in learning new material, a lesson - a creative workshop.
Type of lesson: lesson using ICT lecture, creative work.
Hardware and software: computer, multimedia projector.
Material and equipment:
1. Technological charts for making dolls.
2. Exhibition of rag dolls.
3. Presentation.
4. Russian folk melodies.
5. Fabric, thread, braid, ribbon, cotton wool, scissors.
Interdisciplinary connections: technology, literary reading, Russian language, history, music.
Lesson plan:
1) Organizational stage.
2) Setting the goal and objectives of the lesson. Motivation of educational activity of students.
3) Actualization of knowledge.
4) Primary assimilation of new knowledge.
5) Initial check of understanding
6) Practical work
7) Information about homework, briefing on its implementation
8) Reflection (summing up the lesson)
LESSON SUMMARY
1. Organizational moment.
1. Greeting
2. Checking student attendance
3. Checking the readiness of students for the lesson
Good afternoon, my good 5th grade!
I'm glad to see you!
Stand up straight, pull yourself up
And smile at each other!
Well done, now sit down!
You have working materials on your desks, as needed, during the lesson, we will work with them.
I hope that the knowledge gained today in the lesson will be useful to you in the future!
I wish you good mood and good luck in the lesson!
2. Setting the goal and objectives of the lesson. Motivation of educational activity of students.
Guys! I'll give you a riddle. The answer will be the main topic of our lesson.
Mystery.
wears dresses,
Doesn't ask to eat
Always obedient
But she's not boring. (Doll)
Teacher: That's right, it's a doll. But not a simple doll bought in a store. Do you think your great-great-great-grandparents had toys?
What material were they made from? Children's answers.
Teacher: Indeed, they made dolls from various materials, including the remains of yarn, straw and fabric. (Demonstration of puppets).
Teacher: What do you think, what will we do today in class? Look, I have a magic chest, it will help you with the answer (I open the chest with rags and ribbons). What can be made from these materials? (children's answers)
I am reading a poem.
Rituals in Russia have many precepts
And one of them is sewing amulet dolls.
According to legend, a talisman will protect the owners,
Taking on the burden of trials.
From various scraps of worn clothes,
Okay knitted knots with faith, hope.
But the only prohibition of the ancestors was feared:
So that the scissors with the needle do not touch the doll.
showing rag doll
Teacher: That's right, a Russian rag doll made of shreds and ribbons.
Teacher: name the full topic of our lesson: “Russian folk doll”.
Let's decide what you want to learn, what to learn today in the lesson. (Goals are posted on the board)
(students take the “I want” card and write down their goals):
I want to know the history of the Russian doll, I want to learn how to make a folk doll, I want to learn how to use scraps...
Teacher: That's right guys. We have to get acquainted with the history of the Russian rag doll. Well, the most interesting thing for you, you will learn how to make this wonderful doll yourself, which is the progenitor of the modern doll.
Teacher: The goal is set.
Problematic question: Guys, a folk doll, just a toy or a girlfriend, an assistant, think about it, and then answer the question.
3. Actualization of knowledge.
Teacher: M. Saltykov-Shchedrin stated: “Of all the mysteries that exist in the world, the mystery of dolls is the most mysterious; Without understanding the essence of the doll, it is impossible to understand the person.
In the course of the lesson, you must achieve the goal and understand the questions that I will put before you.
1. Why was the doll faceless?
2. What three types of dolls were divided according to purpose?
3. What does the doll symbolize?
Teacher: A rag doll lived in every house. The children made them themselves. Playing with the doll, the girls learned to sew, embroider, and spin. Each outfit meant something different. But in any outfit there should be a red color. Who knows what red means?
Students: (Answer) Red is life, beautiful.
Teacher: Right. And they also believed that the red color protects from the evil eye and troubles.
And now we will listen to the message of the student: "The story of the rag doll."
Student: The earliest toys date back to the 2nd millennium. The most common toy was and remains a doll. Rag peasant dolls, as well as clay toys, originated from ritual figurines associated with the veneration of a female deity, fertility cults, ancestors and the hearth. To stuff a rag doll, they used ash, grain, linen tow, and rags. The fabric itself - the result of one of the most significant women's activities - was considered sacred, with protective functions. The stable signs of rag dolls among different peoples were passed down from generation to generation for a long time: a simple design created without the use of a needle, facelessness, female details of the costume. The doll was a talisman of a woman, a home, a hearth, she guarded, healed, protected from evil forces. It was impossible to throw them away, it was considered a great sin, so they were kept in chests. The doll symbolized the continuation of the family.
4. Primary assimilation of new knowledge.
Teacher: After listening to the student's message, can we answer the question?
1. What did the doll symbolize?
Student: Procreation, because. the doll was a talisman of a woman, a home, a hearth, she guarded, healed, protected from evil forces.
Teacher: Here is one of the problems posed.
Viewing a presentation.
According to their intended purpose, there were: Dolls-amulets
ritual dolls
Game dolls.
Play dolls were made either specifically for children, more often using the same techniques as ritual dolls, or ritual dolls were given to children when they had already completed their ritual function. There were also traditional children's rag dolls. So that the child was not afraid to be alone at home, they made a “friend” for him - a small “bunny on a finger”. Also, spinning dolls were usually made for games, and together with the girls. Traditional folk dolls were in every peasant hut. Grandmothers taught their granddaughters, mothers taught their daughters, older sisters taught the younger ones. So the people brought up future craftswomen and needlewomen, accustomed to hard work, and at the same time to a creative attitude towards the world.
Guardian dolls. These are special helper dolls whose task is to protect the world of people from those evil spirits that can penetrate and harm it, as well as help in the fulfillment of righteous desires. Already two weeks before the birth of the child, the expectant mother made a traditional Kuvatka charm doll and placed it in the cradle so that the doll would warm her. She created it without a needle by folding and twisting. It was believed that the doll could not be cut or pricked. The amulet doll, as it were, distracted evil forces, protecting the baby. After the rite of baptism, the Kuvatka doll was hung over the bed so that it would drive away all evil forces and protect the child.
ragdoll "Bereginya" , made with her own hands, the mother gave her daughter before the wedding, blessing her for marriage. The guests also gave dolls with the wish that more children would be born.This doll is traditionally placed in front of the front door so that it meets all incoming people and does not let evil forces into the house. It is made from unnecessary, left over from old dresses, shirts, pillowcases, rags. It was believed that if you take rags from a person’s old clothes, then the doll will protect this person even more.
Mystical facelessness is also one of the ancient secrets of a rag doll. The image of a face in a doll was banned in the peasant environment for a long time. When asked why the doll does not have a face, the village women answered that she simply did not need it, that there should not be extra eyes in the house, that a sighted doll is dangerous for a child.
ritual dolls
Ritual dolls were very revered, they were placed in a hut in a red corner. They had a religious significance, became participants in many ritual rites and
holidays. In ancient times, the doll performed an extraordinary mission, replacing human sacrifices. On holidays, they began to sacrifice traditional stuffed dolls to the gods, which bore their own names: Maslenitsa, Kostroma, Kolyada
The time of making ritual folk dolls depended on the time of the ritual. Dolls were usually made before traditional holidays.
The Shrovetide doll was made on the eve of Shrovetide or on the first day of Shrovetide week on Monday, and she was supposed to protect the family for a year. Then, when the year passed and the Maslenitsa week came, the old doll, which had already absorbed all the bad energy, everything bad that happened in this family, was burned and a new stuffed doll was made. He was put in a red corner in the hut, and it was generally believed that the more dolls sit in the red corner in the hut, the happier the year will pass in this family, in this hut.
Now let's listen to your messages.
Bunny on a finger
Mom's helper toy so that the baby does not cry and does not ask for hands in her absence. A bunny on a finger was made for children from the age of three, so that they would have a friend, an interlocutor. The bunny is dressed on a finger and is always next to you. Parents used to give this toy to their children when they left home, and if you get bored or scared, you can turn to him as a friend, talk to him, complain or just play. It is both a friend and a guardian. Children are very responsive and see a kindred spirit in their favorite toy, open up and talk like with a living person.
"Kula - porridge"
Doll for a girl, helper in cooking, the doll gives to a girl
understanding of what a hostess is, not only what her duties are, but also how
it is to be the mistress of the house, how to correctly and clearly distribute your forces.
Doll Kasha is the image of a girl of seven years. At the age of seven, the girl began to cook porridge for the whole family. As an assistant, they made a doll in the form of a bag. This doll was a measure.
Groats were poured up to the legs, water was poured up to the waist up to the neck - porridge was obtained.
"The herbal jug"
(doll of peace of mind, doll of health)
By the name of the doll, you can guess its purpose. It is filled with healing and fragrant herbs. It was believed that the smell of grass drives away diseases, the chrysalis was crushed to purify the air and the grass was brewed from it for treatment. Parents left her at the head of the child at night, so that the sleep was strong and calm. Yes, and for an elderly person - this is a godsend.
And if a child’s tummy hurts, then a doll warmed up on the stove will not only soothe and warm, but also amuse. Such a doll can serve as a wonderful gift and souvenir, wonderfully fits into any home interior. The doll is filled with fragrant hand-picked herbs - oregano, mint, thyme, lemon balm, black currant.
5. Initial check of understanding.
Teacher: So, who is she, a folk doll, just a toy or a friend, an assistant and why? Children's answers.
Teacher: Guys, who noticed one feature of the dolls?
Pupils: (answer) Dolls do not have a face.
Teacher: Why was the doll made without a face?
Student: It was believed that an evil spirit could not move into a faceless doll.
Teacher : "Facelessness" - traces of the ancient "protective" role of the doll, when they were afraid to liken a toy to a person. According to popular beliefs, a doll with a “face” acquired a soul and became dangerous for a child, while a “faceless” one was considered an inanimate object and could not harm him.
Teacher: So, here is the second problem situation solved. Why was the rag doll so popular?
Students:
1.availability of material: old rags were used;
2.quickly you can create a doll.
Fizminutka
Gymnastics for the eyes.
6. Practical work
Teacher: Do you think this work is easy to do? Read on the board the saying "The eyes are afraid, but the hands are doing." How do you understand these words?
Student: You need to do any work.
Teacher: I suggest you choose which doll you want to make. You can choose from fabric or yarn.
Why did you choose this doll?
Safety regulations.
1. Guys, what tool will you work with?
Student: Scissors.
Teacher: Guys, we will work with dangerous objects. And what dangers can we face when working with piercing, cutting objects?
Discussion of the sequence of making a doll.
Individual production of a doll - Beregini.
Teacher: Guys, in what order will you do the work?
Pupils: (Answers)
1. We twist the twist from a large piece of fabric;
2. Put a shred on the twist. We wrap it with threads - we get the head of the doll.
3. Draw the waist with threads.
4. Straighten the corners of the fabric and make hands.
5. Dress up the doll.
Independent work
(work to music)
7. Information about homework, briefing on its implementation.
Teacher: Of course, we won’t have enough time to talk about all Russian dolls. At home, you will find information on the Internet or in the library about other dolls and prepare messages. write down your homework.
8. Reflection .
Teacher: there are beads on the tables, decorate your doll with red beads if everything worked out for you, green beads - you experienced a little difficulty, blue beads - you didn’t like the lesson.
Teacher: friends, let's get back to the topic and purpose of the lesson. Do you think your goal has been achieved?
Teacher: What did you learn new today? (children's answers)
Teacher: What can you tell your parents about this doll?
What can this doll be used for?
Who can give this doll?
(children's answers)
Teacher: Your dolls are ready,
Now we will know:
Dolls full of secrets
And protect houses
And they invite good luck.
Everyone needs dolls in the house
They contain the secrets of antiquity! Analysis of dolls, assessments.
The final stage.
And I want to finish today's lesson with the words of Alexander Sergeevich Pushkin "Respect for the past is the feature that distinguishes education from savagery", so let's love and take care of the culture of our people, to our ancestral roots, because the future grows only from the past!
Thank you for the lesson. Workplace cleaning.
Thing: Art.Teacher : Kylosova E.I.
The date: 28.04.2016.
Class: 5 "g"
Textbook: Fine arts 5th grade. Authors: N.A. Goryaeva, O.V. Ostrovskaya. Publishing house: "Enlightenment" 2014
Subject: “You yourself are a master of DPI. Making a decorative panel using the applique technique.
Target: contribute to the expansion and consolidation of knowledge about decorative panels. Making a decorative panel using the applique technique.
Tasks:
Tutorial: the formation of the ability to make panels using the application technique.
Developing: development of the ability to control, correct and evaluate the educational task and their actions to solve it; development of artistic and abilities of students.
Educational: the formation of positive motivation for a lesson in fine arts by involving everyone in active activities; responsibility for the result of educational work; self-control and mutual control in joint activities.
Lesson type: combined.
Forms of work : steam room and individual.
Planned results:
Subject:
Students should understand what a panel is, explain the role of a panel in the interior, and know the theme of the panel.
Explain the differences between modern DPI and traditional folk art.
Creatively work on the proposed topic, using the expressive possibilities of artistic materials and the language of the DPI.
Personal:
Understand the role of culture and art in human life;
To be able to observe and fantasize when creating figurative forms;
Be able to cooperatewith comrades in the process of joint activities, correlate their part of the work with the general idea;
To be able to discuss and analyze their own artistic activity and the work of classmates from the standpoint of the creative tasks of this topic, in terms of content and means of its expression.
Metasubject:
Cognitive UUD:
To master the skill of creative vision from the standpoint of an artist, i.е. the ability to compare, analyze, highlight the main thing, generalize and draw conclusions as a result of the joint work of the whole class;
Strive to master new knowledge and skills, to achieve higher and original creative results.
Communicative UUD:
Be able to formulate your thoughts in oral speech, listen and understand the speech of others;
Master the ability to conduct a dialogue, distribute functions and roles in the process of performing creative work;
Use information technology tools to solve various educational and creative tasks in the process of searching for additional visual material, performing creative tasks;
Learn to play different roles as a couple.
Regulatory UUD:
- determine and formulate the purpose of the activity in the lesson;
Distinguish between a correctly completed task and an incorrect one;
Be able to plan, control and evaluate learning activities in accordance with the task,
Find solutions to various artistic and creative tasks;
Be able to rationally build independent creative activity, work in pairs;
Know how to organize your workspace.
The main content of the topic, concepts, terms: Panel as a type of modern DPI, the history of panels, a variety of materials for the manufacture of panels.
The concept of application.
Technological map of the lesson
“You yourself are a master of DPI. Making a decorative panel using the applique technique. Lesson number 2 "
Plannedresults
(personal, metasubject, subject)
Time
Organizational stage
Emotional mood.
Organization of the location of each student.
Check, my friend, are you ready to start the lesson?
Is everything in place, is everything in order?
Is everyone seated correctly?
Is everyone watching?
Check if the scissors and glue are in place.
Are the diaries in place?
They take their places and greet those present.
Communicative: planning educational cooperation with the teacher and classmates
Stage of motivation and updating of knowledge
The teacher offers to find the content of the topic of the lesson.
Guys look at the blackboard. All the letters are messed up, help them find their places and determine the topic of our lesson.
Who guessed what will be discussed?
What is our theme?
Students formulate the content of the topic of the lesson.
Making a decorative panel using the applique technique.
Communicative: cooperation with the teacher and classmates;
Cognitive:
the ability to structure knowledge, the ability to consciously build a speech statement;
Statement of the learning task
The teacher activates the knowledge of students, creates a problem situation. Let's remember what we did in the last lesson. What were they talking about.
Guess? What is the topic and purpose of our lesson.
Now let's plan our lesson.
1. Let's repeat the studied material.
2. Learn something new.
3. We will finish the work started in lesson 1.
4. Fix the material.
Students set a task for themselves, name a topic, recall the content of the last lesson. Purpose: to learn how to make panels. Continue working on a decorative panel using the applique technique.
Regulatory:
goal setting;
Communicative6
asking questions;
Cognitive:
self-selection-formulation of a cognitive goal
"Discovery" of new knowledge by students
The teacher organizes students to explore the problem situation.
Let's remember everything you learned about the panel.
What is a panel?
What is an application?
What materials are panels made of? What material do we work with?
Students answer questions.
A panel is an element of room decor, which is designed to decorate the walls, ceiling, and sometimes even the facades of buildings.
Application is the most common type of DPI. This is gluing various materials onto the main background. Panels are made from various materials - paper, natural material - leather, thread, fabric, salt dough, etc.
Regulatory: goal setting; Cognitive:
building a logical chain of reasoning;
Communicative:
proactive cooperation in the search and selection of information
The solution of the educational problem. Primary fastening
The teacher establishes awareness of perception. Work with text. The history of the development of the panel. (Appendix No. 1. Pair work.) Guys now read the text and answer the questions.
They work in pairs. Study the received material. Looking for answers to questions.
Communicative:
cooperation with each other.
Cognitive:
the ability to structure knowledge, consciously and voluntarily build a speech statement.
Dynamic pause
Imagine yourself as a thin birch; mighty oak; weeping willow over the river; a tree with a broken branch.
Personal
Creative independent practical activity.
8.Self-esteem.
Now we will continue the work started in the first lesson. You have a technological map. (Appendix No. 2) Safety precautions.
During practical work, the teacher makes targeted rounds.
Self-assessment of students' work according to the criteria (Appendix No. 3)
Students do creative work. They continue to work on the panel started in the first lesson. Add new elements to the work. Safety engineering.
Self-assessment in the list of achievements.
Regulatory:
highlighting and awareness of what has already been learned and what is still to be mastered, awareness of the quality and level of assimilation;
Personal:
self-determination.
Personal
The ability to determine the level of knowledge proficiency in the way of activity.
9 .Reflection of activity
The teacher organizes reflection.
Where do you think you can place the resulting work?
Have we achieved the goal we set?
Why do you think panels are needed?
Finish the sentence:
I know that…..
It was a revelation for me....
I managed…..
I like it….
Answer questions and engage in conversation. Express their opinion.
Communicative:
the ability to express one's thoughts with sufficient completeness and accuracy; cognitive: reflection;
personal: meaning formation.
10. Homework.
pp.168- 173. Selection of illustrations on the theme of the panel.
Write the assignment in a diary.
Use of new knowledge.