Conclusions: The main thing is that the questioner gets everything he wants. Conclusions: The main thing is that the questioner gets everything that he wanted Shmelev measuring complex work
Continuation of the article based on the materials of the electronic network Internet with reflections from "Notebook" by Yuri Ignatenko and my comments
Dear viewers. HI-FI and HI-END is a marketing slogan, but when applied to a tube amplifier it implies high fidelity. Not embellished, pleasant, namely true, as written on the carrier. And only the amplifier tuned according to the instruments sounds true. And in particular on the Shmelev complex. It is difficult to see small distortions with an oscilloscope, well, except perhaps more than 5% distortion. But neither the nature of the distortions, nor the composition of the harmonics, nor their amplitude can be assessed. With the Shmelev complex, having removed one graph, the tester sees everything. You can see what the quality of the power supply is, how the ripples are smoothed, what is the tail of the harmonics, SOI, IMD, interference 50Hz, power, K amplification, balance of the output stage. You can match the load with the output impedance of the lamp and much more. Often, a ULF made after the first turn on causes euphoria, sometimes it seems that there is nothing to tune in it. How beautifully he sings. But when compared with the sound of a finely tuned amplifier, the result becomes clear. It turned out a relatively ULF curve. The bulk of the ULF described on the sites are actually not tuned at all. Therefore, they sound wrong, although tasty. This is because do-it-yourselfers do not own measurement techniques. However, they immediately retort: “We don’t listen with an oscilloscope, but with our ears.” Yes, at least listen to anything, an untuned amplifier will not correctly reproduce music. And no one in the world produces amplifiers tuned by ear. Guessing the optimal mode by ear is IMPOSSIBLE. It will be set approximately, and coincidence with the exact mode is excluded.
Adjustment is carried out only on devices. Tuned by instruments - always sounds better than not tuned. If you take only one note and ask the musicians to play it on different instruments, then correct reproduction will allow you to clearly guess which instrument is playing. What's the matter, because a note is a note. the same frequency. The fact is that each instrument, in addition to the fundamental tone, also produces harmonics. One instrument creates more even harmonics, the other more odd harmonics. Different instruments have these harmonics in different levels and combinations. So, a home stereo system and, first of all, ULF should not add their own harmonics, but only reproduce the tone, note and those harmonics that are recorded on the media. Otherwise, it will be difficult to guess which instrument is playing.
Learn measurement methods. Everyone has a powerful computer complex on the table - COMP. It needs to be equipped with laces and software installed.

To carry out the settings, you need to make a divider with a ULF load equivalent and a cable connecting the sound card output and the ULF input. It is possible, for example,

For the manufacture of measuring cables, it is better to use an ordinary Soviet shielded cable, or rather its braid.

It is better to make two measuring cables. Let's call them cable #1 and #2

Cable with No. 1 equivalent load, during measurements, connect to the ULF only to the output (instead of the speaker). R3 - the load equivalent should be 5 - 10 watts (depending on the ULF power). 4 or 8 ohms - depends on the load for which the ULF is designed. When connecting a sound card to itself, in order not to pull the sockets on the board, you can use cables with connectors in the middle (male and female). To do this, it is enough to disconnect plugs 1 and 2 and plugs 3 and 4, then connect plugs 2 and 4 - the sound card is connected to itself.
Question. Doesn't the cable's own capacitance affect the measurement results? Those. constructive (meaning the cable coming from the output terminals of the ULF, the equivalent load and the cable to the entrance to the sound box), the length does not matter, and everything from the lamp? Probably, the length of the wires from the TVZ to the load equivalent does not matter, but when the cable went from the equivalent to the sound card, this cord should be as short as possible and without any screens?
Answer. Doesn't affect capacity or length. Because the output is low-resistance from the divider (4 ohms, 8 ohms, 16 ohms - who has what load equivalent). You will see all this for yourself when you make long 1-2 meter cables and run them through the spectrolab, you will see the frequency response of the cables. They will not introduce blockage and distortion.
IMD - intermodulation distortion. They are the main ones, not SOI. They give porridge and if the IMD is large, then against the background of loud-sounding instruments, soft-sounding ones are masked. SOI in transistor ULFs is less than in tube ones, but the IMD is large and it is not given in the price lists for transistor amplifiers! Therefore, listening to vinyl on a good tube amplifier, we hear all the instruments, and how the musician turned the sheet on the music stand. We switch to transistor and there are no these nuances. Porridge. IMD is more important than SOI. IMD hearing immediately determines at small quantities. And THD at low frequencies up to 5% does not determine, and at high frequencies 0.5-1% a person begins to hear. And most importantly, that there would be few harmonics. In a transistor, harmonics extend up to the 20th, albeit small. And in the tube 1-3 harmonics. And the sensitivity of the ear to harmonics increases with an increase in its order. And besides, in the transistor odd harmonics are mainly 3,5,7,9,11, etc. The level of harmonics should be viewed relative to the top of the peak of the main signal 1kHz and not on a scale of 100dB. It is necessary to subtract from the lower value, for example, 80 dB the harmonic sticks out and the main peak sticks out at 20dB, which means the harmonic is at minus 60dB. Harmonics below 60-70 dB relative to the main signal are no longer paid attention. The amplifier will sound good enough. THD and IMD are measured at 1kHz. It's so accepted. But you can measure at any frequency and the data will vary. Noise is measured at 1 kHz. We set the maximum voltage at the output of the amplifier, corrector and see how much the noise is lower than the signal. At -56dB. On the equivalent load, you need to put a divider 1/10 so that at the input of the computer it does not exceed the level of 1 volt.

The cathode resistor is the most serious thing in the tube cascade. To set up, you can first put a variable. And then change to permanent. The anode resistor is also selected with a variable. It is important to remember that the practical result never coincides with the calculated one or with what is written in the diagrams. You can always choose the best mode. Moreover, it is possible to compensate for the distortion of the output stage by the distortion of the prestage. Especially in a push-pull amp. The driver lamp setting table is shown below.

Now you can play around with the OOS from the exit to the cathode of the first lamp. Removes background and reduces THD and IMD. Better low end will be played.
Question. I don’t understand why there were about 4-5 watts on the load before setting the OOOS, and after tuning, 2-3 watts remained, but at the same time IMD = 0.3-0.4 percent, but the resistance of the OOOS with 2 kom had to be reduced right up to 240 ohms, although according to Shmelev, the amplitude level decreased by only 10 dB. What's my mistake?
Answer. Do not reduce the LLCOS resistor to such values, the amplifier may in this case be excited and will be unstable at the peaks of the signal. The power with OOOS does not decrease, but rather increases with the same distortion, and the maximum power also increases. It just reduces the input sensitivity. You may have dulled the sensitivity to such an extent that the output voltage of the sound card is no longer enough. That's why I put 6F1P in the driver, so that with an increase in the LLC, the sensitivity would be in the range of 300-500mV.
Gnat. Now I have finished setting up the next ULF two-stroke on 6N9S and 6P3S with TVZ tori. I soldered everything according to my scheme, as I did. But the anode in this is according to the doubling scheme. 380 volts under load and all the parameters floated away. See what happened as a result of tuning both in frequency response and in SOI and in IMD. And carefully look at the table (I changed resistors for you) and took measurements to see the effect of the number of turns of the secondary on the sound and the effect of the resistor value on the sound, what affects what and to what extent both cathode resistors and anode resistors. It took six hours to set up and the sound became fabulously beautiful. Well, it is impossible to squeeze the maximum possibilities out of the ULF, soldered according to the scheme from the Internet, without instruments and measurements.

At best, you get such an average ULF with an average sound


Evgen. So you posted the diagram. I did and did it according to it ... And now it turns out that it will not work normally. Now I really don't understand anything.
Gnat. Evgen, I made and adjusted the same scheme today. Will work. Look at the schemes are the same, that today is mine, that that one is yours, mine. Only you always have to select exactly the resistor in the anode of the first stage. Set the output stage mode. Select taps in the TVZ secondary in order to precisely match the output lamps with the load. Only with precise matching, the output stage produces minimal distortion to the load. And you can choose only by the SOI meter. How else to explain to you that it is impossible to assemble an amplifier according to the description and diagram, and get the best possible characteristics from it without tuning. Any industrial amplifier released on the assembly line can be improved and greatly improved. Setting Which is what I and many others do. Tweaking amplifiers, Japanese, American, English, German. They are all unconfigured. Send from all cities. Or did you think - for example, you soldered a circuit that someone posted on the Internet and praises, and everything will sound? Setting, final operation. The most important. See the experiment with our lamps. Our scheme, the same two-stroke. We put 6N23P and set the modes. 150 kOhm in the anode is the best mode and the smallest SOI. We put 6N2P and SOI 10% immediately. We now know that it is not the lamp that matters, but the resistor. For 6N2P and 6N9S you need 330-380 kOhm and the THD will become low and the amplifier will sound.

Question. What is the setup sequence?
Answer. There is a clear sequence of settings. First, the output stage, set the current with the cathode resistor, but do not exceed the maximum allowable parameters so that the anodes do not heat up. Keep in mind that the voltage in the network can rise and fall, depending on the time of day - take this into account when setting the cathode current.
So mode A is both at 35mA and at 55mA. Not on the maximum current and not on the eye, and not on the maximum dissipated power you need to focus. And at least SOI and IMD. It all depends on TVZ, what kind of gap and when the iron starts to enter into saturation. This is the current we are looking for. First, we set the current to 30 - 35 mA, then by increasing the current, we watch how the SOI decreases. Further we increase, and SOI suddenly begin to rise. It speaks of saturation. We roll back on the current. This is the optimal current for your lamp and TVZ.
Then we put 2 volts at the output (or 4 volts - it depends on the power of the amplifier) and with the taps of the TVZ secondary we match the load with the output impedance of the output stage, this is the most important thing. It is impossible, when winding TVZ, according to the description from the Internet, to get into agreement exactly. Never! And the pentode and on the beam tetrode output stage does not forgive mismatches, especially single-cycle. Then we select with the same output signal 2 volts (or 4 volts - it depends on the power of the amplifier), the resistor in the cathode of the first lamp for the least distortion, maintaining this output voltage all the time. With a different value of the anode resistor of the first lamp, the cathode one will have a different value. They are mutually related. Grid resistors do not affect SOI. Then we increase the OOS value, reducing the resistance that comes from the output winding to the 6N2P cathode. THD and IMD will decrease, but the sensitivity from the input will also decrease. No need to be very rude, find a compromise so that there is enough sensitivity and SOI are normal. With the OOS resistor we set the OOS with a depth of 6 - 10dB. the value is visible by the drop in gain, on the dB side scale, even on Shmelyov, even on the Spectrolab. Disconnected the resistor, the output signal level rose. I connected a resistor - the level dropped.
Or so. - Turn off the LLC and set up the driver first (at 300 kOhm in the anode, 6H9C has a large gain. You should not decrease otherwise you will not get a sensitivity of 500 mV from the input.). We select a cathode resistor according to the minimum SOI, a variable resistor of 3 kΩ and twist it and look at the screen. Then bring the current of the two output lamps (6P6S) to 90mA, that is, lower the value of the cathode resistor to 200 ohms, this is already at 2-3 watts of output power. With taps on the secondary, to achieve a minimum THD. Then solder the OOOS resistor and make sure that it is OOOS and not POOS. The volume should decrease, not increase.
The value of the LLCOS resistor is not selected according to the minimum THD. With this resistor, we set the depth of the LLC. I usually do 4 - 8 dB. If you further reduce the resistance, then the SOI will also decrease, but the sensitivity from the ULF input will not be enough. 4-8 dB is the gain drop on Shmelev's screen. Without FOOS, the 1 kHz peak is for example at -10dB, and when the OOOS resistor is connected, it drops to -14 or -18 dB, this measures the OOOS value. Usually, we make the gain of a two-stage ULF in the range of 9-13 times. If the first lamp is a pentode (for example, 6Zh1P, 6Zh4, 6Zh8), then the ULF gain is greater than with a triode and LLC can be made deeper up to -12-15dB sensitivity is enough.
Question. Which stage, driver or output, gives the most distortion?
Answer. Need to understand. In a single-cycle ULF, the main distortion of 3-10% is given by the output stage, this is disproportionately more than the driver gives. Therefore, do not twist the cathode resistor in the driver - the SOI at the output of the amplifier changes little. This is a fact, because with any 1-10 kΩ cathode resistor, the THD is still less than that of the output stage. But in a two-cycle, with a balance resistor and the correct TVZ, the output stage has a THD of only 0.05-0.1%, and those 0.5-1% that the driver gives immediately climb to the output. Therefore, the pre- and PHI mode must be selected very accurately in order to get less THD than the output push-pull gives. With a cathode resistor, we are looking for a point less than 0.1%.
Question. I have a single cycle on 6P14P. The output stage offset is fixed. The cathode is on the ground, the current is easy to change. Now Ucm=13.5V at 30mA. When connected in series +5 turns +5 turns, etc. to the secondary, there is a gradual increase in% distortion. It turns out that additional 30 turns of 0.9 wire are not needed.
Answer. The current is small, only 30mA. Therefore, the internal resistance of the output tube is relatively large. Add current and reduce the internal resistance and the matching will improve. Always be guided approximately by winding, at least according to TVZ1-9 data. The ratio of the turns of the primary - secondary. You don't need to rewind anything in your secondary. Do you have normal TVZ, although I don’t know if there is a gap? From a single cycle to 6P14P you will not get good results. Single-cycle it is single-cycle, and in any single cycle with a maximum SOI power of 5-10%. Here in a two-stroke it is possible to reach 0.2%.
Question. To what value can you raise the anode in 6P41S? The anode will start to turn red - for each value of the anode, the maximum allowable anode current is different? That is, it is not necessary to exceed the power dissipated by the anode. So how much should it be? 14 W or can it be raised up to 20-22 W?
Answer. From 310 to 340-350 volts. If it is possible to change the anode, start with 310 volts. With a two-watt trimmer, select the cathode resistor according to the minimum distortion and write down the result (which is the minimum distortion), then add the anode one, select the cathode again and write down the distortion. Etc. Thus, you will find the best option. Periodically check the current, so that it does not differ much from the maximum (naturally, given that the anode is increased, the current will have to be done a little less). Then you drive the amp, if the anodes do not glow, then everything is fine.
Gnat. Everything is written correctly, so set it up. More voltage - less current. But the taps are selected last. When the current has already been found and a certain internal resistance of the lamp has developed in the mode that you have. (After all, by walking along the current and voltage, we can change the internal resistance of the lamp by TWO times). Another optimal current depends on TVZ. At 340 volts of the anode at Kharkov TVZ, the best current turned out to be 48 mA, and at Zhytomyr I catch up to 70 mA. The lamp according to the passport 15 watts dissipates. In fact, 25-28 watts holds perfectly and does not heat up. In a single cycle at Stas in Kharkov (I brought out a regulator for him and he regulated the current himself), even at 310 volts 100-120 mA they kept the lamps But only a week, but how they sang! So he bought them (fortunately 10 hryvnia price) and changed every week. He also noticed a difference. Pentagon-marking, blot-marking, some other marking there - they hold different power.
Question. How to find out what load the TVZ is designed for?
Answer. To understand what resistance TVZ is wound on, we do this. We connect the equivalent load of 4 ohms to the ULF output and measure at 2 watts and record. Then 6 ohm load and again at 2 watts we measure, analyze, did the THD increase or decrease? If it decreases, then we connect 8 ohms, then we connect 10 ohms and measure, the THD decreases, we connect 12 ohms - it starts to increase. So 10 ohm load for this TVZ is optimal. We connect 10 ohms and start playing with modes, look at the SOI.
Question. How is 6N2P configured for the first and second triodes and these 33k resistors, what do they affect? Do they need to be selected somehow?

Answer. For the second triode (phase inverter), the whole setting comes down to putting two identical resistors into the anode and into the cathode, and that's it, while for the first triode you can pick up only the anode resistor by changing it from 120 to 360 kΩ. I think 250 - 300 com you will have the smallest distortion. Just turn it off and solder a new one in increments of +50 - 80 com or put a variable. And measure each time maintaining the same voltage at the output. For example at 4 volts. And write a table. (You can solder resistances in series).
Advice! Always use shmelev. It is impossible without a spectrum analyzer to tune the amplifier you have assembled, squeezing everything possible out of it. I make the same circuit many times and each time the driver setting according to Shmelev. Selection of an anode resistor in 6H9C in a push-pull. Today I found another point on the CVC - a wonderful point. 530k anode resistor and 1k cathode resistor. Anode supply voltage 280 volts. The voltage on the phase inverter is obtained at the anode 210 volts, at the cathode 70 volts in this case. The maximum possible gain is obtained and the distortion is minimal up to the limit.
The end follows.
Evgeny Bortnik, Russia, Krasnoyarsk, August 2015

Sound cards and their application (chapter from the book by Yu.S. Magda, Computer in the home laboratory)
Radio hobby. Software review for 2002 - 2011
RightMark Audio Analyzer
AcoustiSoft ETF5.9
AtSpec Spectrum Analyzer Pro
Sample Champion Release 2.8
Boxplot Speaker Design Tool v.3
PE Box Loudspeaker Utility v.1.1
ProfiLab Expert
Digital Oscilloscope v.2.51
Software Oscilloscope
Realtime Audio Spectrum Analyzer
Multi Tone Generator V1.5
RPM Engine Speed Tacho V0.91 beta
DaqGen for Windows
SG One PC Audio
TMS-1 PC Audio Test System
DS-100-1
WinAIRR
Wavosaur
Daqarta V6.00.1
Software generators of sound signals. Review (E. Muzychenko)
Software spectrum analyzers. Review (E. Muzychenko)
SpectraLAB in amateur radio measurements (K. Nasedkin)
Electroacoustic measurements in the SpectraLAB program (E.I. Vologdin)
Acoustic laboratory of an audiophile-radio amateur (I. Petrukhin)
speaker workshop
WinlSD
JBL Speaker Shop
audioTester V3.0. User Guide (translated by V.N. Gololobov)
Testing audio paths using a computer (E. Lukin)
Generation of test signals on a computer (E. Lukin)
RightMark Audio Analyzer 6.0. User guide
Computer physics experiment (L.V. Pigalitsyn)
Virtual instruments in physics lessons
Experiments using virtual and real instruments
Measurement of electrical resistance, capacitance, inductance and frequency
Virtual instruments on the Sound Card (O.L. Zapisnykh, S.O. Savchenko)
Virtual laboratory concept
Oscilloscope
Combined LF generator
Two-phase LF generator
Oscilloscope recorder
Frequency meter
AC curve tracer
MultiMeter
TechnoGraph
electricity meter
Meter R, C, L
Thermometer
Home electrocardiograph
Capacitance and ESR Estimator
and others
Real-time computer measuring complex (O.Ya. Shmelev)
Sweep computer sound generator
Multifunction Spectrum Analyzer
Measurements with a Spectrum Analyzer and a Sound Generator
About the concept of controls and display
Infrasonic range in computer devices
Practical Factors Affecting Measurement Accuracy
Features of the use of sound cards in the measuring complex
Graphical interface of computer measuring instruments (O.Ya. Shmelev)
Virtual Measuring Laboratory PowerGraph (D.Yu. Izmailov)
General information
Preparing for measurements
Taking measurements
data editing
Signal processing
Signal Processing Functions Reference - Part 1
Signal Processing Functions Reference - Part 2
Signal analysis
Spectral analysis
TINA-TI software and circuit simulation
Current setter 4-20 mA for setting up automation systems (S. Skvortsov)
Spectralab
Downloading the program Spectrolab and read the instructions in Russian. In the software mixer on your computer, first set the record level and volume controls to the middle position of 50%. You need two shielded cords ending on one side with a 3.5mm JACK on the other side with a tulip, so that the jacks are plugged into the OUT and IN computer, and the tulips into the input of one of the channels and to the equivalent load with a 1/10 divider. That is, a 4 or 8 ohm resistor (which is necessary for this ULF) and in parallel a divider chain of 91 ohms and 10 ohms. solder a socket to 10 ohms in order to stick a tulip.
Now we check your measuring complex for linearity. We connect the cords to each other (I have two sockets connected) and run the START program. At the bottom in the left corner there will be squares, green, yellow, red (line level indicator) You need to set the volume control in your software mixer, so that there are 4-5 green cubes. The decibel scale on the left is vertical, set the upper mark as I have 100dB. Call the GENERATOR menu and set the sweep frequency generator to extreme 0Hz and 20kHz. Call the scale setting and set the lower scale to 0 and 20 kHz too. Now press START and if you have connected cords to each other (computer input and output), the program will start drawing the frequency response of your complex. Usually, even the cheapest sound frequency response is linear from 15Hz to 20kHz. When the line is drawn, press STOP. In the upper right corner there is a window in which you can save this graph. There you can save FOUR graphs. They will be different colors. Now that we have understood how the program works and what is the frequency response of our complex. We connect the cords of the computer output to the ULF input. The computer's LINE input to the jack you made on the 1/10 divider on the equivalent. Connect the equivalent to the ULF output instead of acoustics. Press start and turn up the ULF gain with the volume knob. You will see how the line rags on the volume knob. The line moves smoothly from right to left. You should adjust the gain so that at 1kHz the line travels about 80dB. Now press STOP. And then Start. Began to shoot the AFC. The line moving from right to left will draw the frequency response of your ULF. Or the frequency response of any four-pole connected to the cords from the computer. You can instantly get the frequency response of the amplifier. By submitting not a SWIP generator, but White noise with a uniform distribution. White noise has the same power at any frequency up to megahertz.
Start learning slowly. You still have to measure. Do not listen to balabols who do not know how to use programs. Measurements are made with high accuracy, and firms producing amplifiers and acoustics also carry out measurements with the Spectrolab and post these measurements on the pages of Magazines and on the Internet, as well as in the accompanying documents for their products.
Well, the 3D spectrometer is generally indispensable when setting up the ULF and any device in real time. I see all the changes that occur with the signal, I see sub-excitations, noises, how the background changes and the signal-to-noise ratio. There is no such device that would replace this computer. Neither in terms of clarity, nor in accuracy, nor in the amount of information displayed on the screen.

I'm still using the free version. 15-20 seconds is enough for me to measure any parameter. There are crooked programs. I'll post links.
http://www.calitca.narod.ru/acuctica/speakerworkshop/speakerworkshop.html
http://www.igolkin.com/forum/viewtopic.php?t=46&start=0&postdays=0&postorder=asc&highlight=
http://boks.at.ua/load/
http://cityradio.narod.ru/utilities.html Spectrolab crooked
http://myaudio-hifi.ru/programs/programs.html
http://audiopfil.tut.su/test.html A test CD, without which it is impossible to test anything in the home complex.
______________
Gnat: 1.4. practical possibilities.
Computer analogues of this audio frequency generator, which could compete in the quality of a sinusoidal signal, a set of functions and ease of use, are unknown to the author.
The use of 16-bit sound cards of the middle class in a computer makes it possible to obtain the coefficient of nonlinear and intermodulation distortion of the sinusoidal output electrical signal of the generator no worse than 0.002%, the relative instability and frequency setting accuracy no worse than 10-5. Thus, in the audio frequency range, this generator is not inferior in signal quality to a very good industrial generator G3-118. The use of high-quality 24-bit sound cards with an operating sampling rate of up to 200 kHz (for example,) in a computer makes it possible to synthesize an audio sinusoidal signal that is superior to the signal of the G3-118 generator in all respects, except, perhaps, only the output power. In the sweeping frequency mode, the developed generator is in many cases capable of replacing such a device as the RG3-124.
Due to the fact that the described generator is a two-channel one, it can obviously replace two traditional (hardware) generators at once in each of the modes. The presence of two independent channels with an adjustable phase difference between them makes it possible to use the generator to adjust and verify the phase meters of the infrasonic and acoustic ranges. Here, this device can successfully replace the F1-4 type phase calibrator, significantly surpassing the latter in terms of the accuracy of setting the phase shift value.
When generating eight independent oscillatory processes for each channel, the described device immediately replaces 16 separate generators operating on two separate loads. The multi-tone mode makes it easy to model complex composite signals for setting up and verifying meters of non-linear and intermodulation distortions in the audio and subsonic range. Similar industrial generators are unknown to the author.
In the noise synthesis mode of the audio frequency range, the developed generator in most applications can completely replace the G2-37 and G2-47 devices.
The developed digital two-channel generator of sinusoidal, square-wave and noise signals of audio frequency makes it possible to build an economical and compact measuring laboratory, which at the same time has high metrological characteristics.
Gnat: SOI and IMD are measured at 1kHz. It's so accepted. But you can measure at any frequency and the data will vary.
Noise is measured at 1 kHz. We set the maximum voltage at the output of the amplifier, corrector and see how much the noise is lower than the signal. At -56dB. On the equivalent load, you need to put a divider 1/10 so that at the input of the computer it does not exceed the level of 1 volt.
Gnat : The theory does not coincide with practice, there are too many introductory unaccounted for or unpredictable and insufficient for calculations. Previously, in those years, everyone made amplifiers by approximately adjusting the parameters. Seeing nothing. Now, about 7 years ago, I saw the light when I realized what a powerful computing and measuring tool we have on the table for everyone. A computer! But only a few out of millions use it. That's why I wrote in my first post. Explore the Shmelev complex and Spectralab. Then you can coolly tune the ULF. Otherwise, a simple amplifier will turn out, mediocre.


Gnat: And my other advice. Learn to measure ULF parameters. Download the Shmelev measuring complex and master it. It is impossible to build a good quality ULF without seeing its frequency response. KNI, IMD. Well, how can you make a TV, where UPCHZ and UPCH are on the contours, without a frequency response meter?
Impossible. So in the ULF you need to see the frequency response to adjust. Measure THD and reduce to the limit possible. Compare channels with each other and compare characteristics.
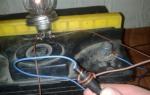
Divider and load equivalent and input protection if you climb into the circuit, but I do not recommend poke anywhere. Only measure from the ULF output.

Gnat: It is necessary to measure the voltage with the inserted lamps. Everything will be okay.
On-line calculator and program for transformers.
http://astar3.ucoz.ru/index/0-6
Yuri: http://www.gzip.ru/vintage/usilitel_na_lampah.htm a simple and understandable estimate calculation of the output transformer
Gnat: I measure with a different program. She has a more visual view of the panel. Where we see everything at the same time.
http://shmelyoff.nm.ru/
Alex7: http://www.mirofelectronics.narod.ru/Spravka/Magazine/Radioh.htm Radiohobby magazine No. 1 for 2003, good article
Gnat: Here is a new topic. And the answers.
http://www.radioland.1bbs.info/viewtopic.php?t=1503
2max2: how to connect the amplifier to the computer correctly in order to view the spectrum of the amplifier in SpektraLab.
Gnat: From the output of the computer, apply a signal to the ULF input. Connect a load equivalent to the ULF output. At least a 2 watt 4 or 8 ohm resistor. This resistance is what your amplifier is designed for. Parallel to this equivalent, connect a divider made up of resistors in a ratio of 1/9, for example, 10 ohm and 90 ohm or 20 ohm and 180 ohm or 30 ohm and 270 ohm, etc. Small resistance to ground, large resistance to output terminal. From the middle, take the signal to the line input of the computer. Turn on the program and set the volume control to 4 green squares to remove the frequency response.
Alex7 wrote: Why we don’t want to teach it, we want to, so we’re burning quietly.
Gnat: Why are you like this? Where did you poke. I decided to measure the SOI of the driver and put it in the anode circuit? In addition to the output transformer, the secondary winding with a connected load equivalent, you can not connect the input of a sound card. Especially a LAPTOP. Why I do not recommend using NOUT as a meter. You need a simple COMP on a Pentium 1 or 2 assembled with a simple video card and a sound system for 80 hryvnias. Total computer will cost you $ 40-50. We put a 1uF capacitor at the input. for 400 volts, a 100 ohm resistor in series and two silicon diodes connected in parallel to each other in series. So that they do not miss the signal to the input of the card more than 1.4 volts. Then you can poke wherever you want. But with a divider at the input Comp more than 1 volt does not measure the signal. It happened in the card of my computer that the linear input went out of order (when there was no input limiter), so there are many other inputs in the computer card. Switched to MIDI input and work again. Or replaced the field worker who puts the input on the ground. Usually it flies on impulse, and the map is intact.
On the sound card, too, explained everything. I didn’t know that you would poke the input of the sound where you didn’t get. Only to the ULF output, if you connect it, it will never burn out even without a limiter and a voltage divider.
To do this, you do not need to connect on the snot, but make a shielded wire on one side of the plug into the computer to be plugged in, on the other hand a TULIP that will be plugged into a socket fixed on a dummy load.
lava: Allowable length of wires from the line output of the sound card to the input of the ULF and back from the VLF output to the line input of the sound card? Are the wires shielded? Are the channels connected and configured at the same time or one by one?
Gnat: Wires of any length, only well-shielded Soviet ones with a solid braid without gaps. Channels are tuned one by one.
Gnat: Set the output and input levels to normal, so that there are 4 green and one or two yellow squares and write down a tone of 1 kHz. Then, without touching the regulators, go to SWIP and write down the frequency response of your card, then disconnect the cord from the output and input and without touching the regulators, write down the noise of the card. Then I will comment everything. Post three screenshots.
You still have the microphone input turned on. The noise is very big. You need to look for how to switch to the line input in the recording channel.
The GREEN squares should not light up. At least set the record control to the maximum if the line input is on. It is blunt and has a sensitivity of 0.5 volts. A microphone has a sensitivity of 5 mV. Here it is noisy and overloaded.


Gnat: According to the measurements, the topic was opened. Moved everything there. Vasily defeated Zvukovuha. I realized that it works under XP. I realized that a simple one with a sampling rate of 41 kHz can be measured, and it measures up to 20 kHz. By measurements, we write everything there in the topic by measurements.
http://www.radioland.1bbs.info/viewtopic.php?t=1586&postdays=0&postorder=asc&start=0 - Frequency response measurements
Gnat: Turn off the OOS and you will see a blockage on the HF.
In Shmelev, after 15 seconds, when it turns off, press STOP and the generator will not turn on. Then when you need START and again after the completion of the measurement after 15 seconds STOP.
At the top of the Spectralab there are two windows. It is written in the second, for example, there you have 70dB, which means the entire scale takes 70dB. Move the cursor there and change it to 30dB, then the whole scale will be 30. The first one says 100dB for example. So you will have 100dB on top
Set your first window to 100dB in the second 50dB and it will be fine.
If you check the box, the chart will be remembered on the screen, and so you can remember FOUR charts and remove the fifth one and Stop by clicking on the FIVE charts on the screen, seeing how it changes and what changes in the setup mode.

Dan: what do the spikes to the left of the peak mean? Why aren't they on lamps?

Gnat: Vital according to Shmelev everything is visible and everything is displayed in the right vertical column. You just need to hover over any value in the vertical column and a rectangle lights up with a hint in Russian what it means. On the left, we see a 50Hz hump - network pickups at the input terminals and snot inside the amp, which is why you need to put the input jacks next to the volume control, and not pull shielded wires from the back wall.
The second peak -100Hz is not smoothed pulsations of two half-wave rectifiers in your ULF. And from here follow 100x2 Hz 200Hz peak. 50+100Hz - 150Hz peak and their derivative peaks, multiples of 50 and 100Hz. 300Hz, 350Hz, 400Hz, etc. And even on the slopes of the main signal there are these pickups, modulating the signal.
If you buy everything in order to make one amplifier, there will not be enough money. And why buy this old rubbish when there is a computer on the table. Who measures everything with Shmelev's program. You calibrated Shmelev's 6.3 volt winding, so you can safely measure it with this Shmelev selective millivoltmeter. It shows exactly what you need. The environment is the quadratic value of the voltage, as well as the tester, as well as the VK 7-9, which also needs to be calibrated. Now I will do some lab work for you. I will show the ratio of the oscilloscope readings and the actual voltage readings with a tester, a Chinese multimeter and a millivoltmeter output meter.