Felting three-dimensional paintings. Wool paintings
To make a picture you will need:
- kleimer frame (it consists of hardboard (fiberboard), glass, kleimer-clamps);
- wool (combed tape) different colors- 6 colors are enough for this work: white, blue, light blue, yellow, brown, dark green;
- scissors,
- tweezers (for laying out small details of the foreground),
- interlining or flannel - whatever you find (as a substrate).
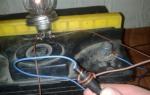
We disassemble the frame. We put the kleimers aside (they will be needed at the very end of the work. On the hardboard (hardboard) we put a substrate - interlining. It is designed to "hold" the wool fibers on itself. The working surface is ready!

On the prepared surface we lay out the sliver (undyed, unbleached wool), evenly filling the entire area in any direction. At the same time, we draw out the fibers from the woolen tape in the form of wide thin strands (as shown in the photo Step 3)
This stage is necessary for the formation of the base layer of the picture, as well as in order to "feel" the wool (in my last works, I do not use a sliver, I immediately spread the colored wool)

This method of working with wool is called "pulling". Indeed, it turns out that we pull the wool fibers from the combed ribbon, which we hold in one hand, with the fingers of the other hand, forming thin strands.
To make it clearer, I show on dark wool.

Having laid out the working surface with a layer of sliver, we proceed to the formation of the background of the picture. In this case, we use a different method of working with wool - "plucking" (see step 5)

The method of "plucking" wool is implemented as follows: we take in one hand a combed ribbon of the color we need, while taking exactly the FOLD of the ribbon (see photo); with the fingers of the other hand, we pinch the superficial hairs of the tape with frequent quick movements. A fluffy lump forms in the hands, which we lay out on the work surface.

Go with blue and blue wool we form the background (background) of the picture. We also use the pinching method.

We continue to draw the background. We highlight the middle of the picture with the help of white wool, create something like haze.

Using the pulling method, we form strands from which we add snowdrifts. We use white and blue wool.

With white wool we determine the place for the moon. This will be a halo of light emanating from her.

We add here and there strands of yellow wool so that the light of the moon is warm. We form the moon itself by cutting white wool. Those. take a strand of wool and cut it thin enough so that the length of the hairs is 2-3mm. And the resulting fluff is laid with tweezers on the picture, forming a circle.

With white wool we draw trees in the distance. At the same time, we cut the wool directly onto the picture, correct it with tweezers, what lay "not right".

Fill the horizon with a forest of white snow-covered trees, as described in step 11.

Let's make the picture "warmer" by adding yellow wool to the snow.

Draw the skeleton of the house with brown wool (you can "cut" the brown wool or roll a strand of wool into a ball and lay it on the surface). Draw a window with yellow wool. White wool will help to give our house a finished look - let's draw a snowy roof and a snowdrift at the base of the house.

We combine in one thick strand the wool of dark green, blue and Brown, then we cut this strand onto the picture, forming a Christmas tree. (non-uniform color of the Christmas tree is preferable - it looks more natural).

With white wool we draw snow on the Christmas tree, we use the same technique as in the previous step.

Draw tree trunks with brown wool. To do this, pull out thin long strands and twist them slightly. In the same way we draw branches.

With white wool we will make highlights on the trees.

We cut white wool and lay fluffs on tree branches. I tried to depict young pines covered with snow.

To the left of the moon, draw a couple of trees. Trunks and branches are formed by twisting thin strands of brown wool, you can add a little white (glare).

Draw snow branches with white wool. It is better to cut wool directly on the picture, forming the desired shape with tweezers.

With yellow wool we will make a “moon path” on the snow, it should be quite “blurred”, and we will also make the moon, one side of the Christmas tree and the crown of pines a little yellower.
With blue wool we will make a shadow from the Christmas tree as shown in the photo.

We cover the finished picture with glass (before this, the glass must be cleaned, for example, I use napkins to clean displays). We clamp with clamps
glass and hardboard with a woolen picture between them, cut off the excess wool protruding along the edges.
The finished picture can be framed in a baguette.
And this, in fact, the picture is already under glass (it somehow appears brighter under it):

- If you don't have a wide choice of coat colors, that's not a problem. Wool of one color, when mixed with wool of another color, like paint, forms shades varying degrees homogeneity. Using the shades obtained by mixing the primary colors, you can create an amazing picture. For example, I really like contrasting things. Having only 2 colors of wool available, you can create a complete picture (for example, dark blue and white wool is enough to "draw" a chic night landscape). As my mother says: "The need for inventions is cunning" (about someone's ingenuity, especially with tight means)
- Do not try to copy the image (photo) exactly, use it only as a model and source of inspiration. Do you have your own personal vision for this story? You, as a creator, as a creator, have the right to place your own accents in this plot (add or remove some details in the foreground, slightly or completely change the background (background) of the picture, choosing the colors and shades of wool that are most suitable in this case)
- To speed up the natural felting of the wool, it is useful to periodically, in the process of laying out the picture, gently clap it with the palm of your hand to fasten the layers together.
- For paintings with a dark background (dark blue, black, brown, etc.), it is convenient to take black interlining as a substrate. In this case, you can start laying out the picture not from the sliver, but immediately from the colored wool you need dark color. Thus, a lot of effort and time is saved, as well as the material itself (wool).
Master class on making a picture of wool "Summer Bouquet"
Masagutova Liliya Vasilievna, educator MB preschool children's garden No. 6 "Cornflower" p. Shushenskoye Krasnoyarsk Territory.Target: Making a picture from wool with your own hands.
Tasks: Develop artistic taste, shape Creative skills and the desire for creative knowledge and self-expression.
The master class is designed for everyone who is fond of creativity, needlework and loves to create beautiful, original and unique things with their own hands.
Purpose: gift, interior decoration.
Technique: wool painting.
It is difficult to find a person who would not love the holidays. They are loved by adults and children. Holidays make life brighter, more fun and more varied. After all, these are unforgettable moments of relaxation, joy, fun and pleasant meetings!
We love holidays
We are looking forward to it.
We bring the holidays
Joy in every home.
Starts with a song
holiday day,
Burns in the heart
Warm flare.
It's a pity that they end
Holidays,
But not forgotten
They never.
(V. Stepanov)
But what is a holiday without gifts? People give each other a variety of gifts: expensive and inexpensive, large and small. Most people buy gifts in stores where they are beautifully packaged. But at the same time, it was always believed that a gift made by oneself is better than bought in a store. A handmade gift means that a person has invested his skills, attention and warmth in it. And also fantasy, to give the gift a special meaning, to present it beautifully. This is more important than just spending money in the store.
I bring to your attention a master class on making a picture of wool "Summer Bouquet". Flowers are a symbol of beauty and harmony. They personify the human desire for beauty. Striving for the harmony of the soul, a person improves the surrounding space, decorating it with flowers. A picture made of wool depicting a bouquet of wild flowers will be a wonderful gift for any occasion, it will bring coziness, warmth and comfort to your home. good mood!
Necessary materials:
Felting wool (combed ribbon): white, light blue, blue, green (three shades), yellow (two shades), crimson, black, gray, and terracotta;
A4 photo frame;
Tweezers;
Scissors;
Flannel white color or fleece.

Step by step description works:
1. To prepare the base, we need a piece of white flannel, which we put on thick cardboard.

2. Lay strands of white wool on the prepared surface. At the same time, we draw the fibers from
woolen ribbon in the form of wide thin strands.

3. We proceed to the formation of the main background. At the top of the picture, White background on
diagonally lay out thin strands of wool blue color. The strands should overlap each other.

4. Lay out the lower part of the picture with strands of light green wool.


5. Add thin strands of light yellow wool.


6. Add some very thin crimson strands.

7. We draw out not large strands of bright green color and lay out the central part.

8. We draw out a wide strand of bright green wool and lay it in the place where the stems of the flowers will be.

9. Pull out thin strands of dark green wool for stems and twist them between the palms.


10. We lay the resulting stems on the green strand, while bending them in the right places,
forming a bouquet.


11. We shade the stems with thin strands of wool trouble.

12. We twist thin strands of gray wool between the palms and add them to the green stems.


13. For the formation of cornflowers, a strand (of medium thickness) of blue wool is needed.

14. We twist the blue strands on one side.


15. We lay the finished petals, forming flowers.


(Do not forget to apply glass - under it you see the final result of your labors).
16. Pull out strands of white wool and cut into small pieces to create daisy petals.


We twist the petals at the ends.

17. From the finished petals, we form daisies.


18. We cut a strand of dark green wool finely, since it is impossible to cut long fibers of wool
lay out the small details of the picture and lay out the sepals.


19. A strand of dark green wool is cut into small pieces to create leaves
and twist at the ends.


20. We shade cornflowers with very thin, short strands of pale blue wool. We put the leaves.

21. From finely chopped black and dark blue wool lay out the cores of cornflowers.


22. From bright yellow finely chopped wool, we form the hearts of daisies and shade them with small
pieces of terracotta wool.
Felting, or as it is also called felting, felting - special kind needlework, along with embroidery. With the help of wool, craftswomen create delightful unique paintings, toys and crafts. It is not at all difficult to make such a craft with your own hands, because now needlework is widespread, and in stores you can find a wide variety of ready-made kits for creating paintings. There are 2 ways to make crafts. In this article, we will talk about what felting is, and what kind of pictures you can get, depending on the chosen method of needlework.
Pictures made by felting wool are very airy and warm.
Felting pictures: types
On the this moment There are several types of this type of needlework - dry and wet. In the first case, paintings and other crafts are created using a special felting needle. The dry wool is pierced many times to get the right texture and pattern.
In this case, the wool falls off, its fibers are fastened to each other, as a result, a homogeneous material is obtained.
During wet felting, wool is felted with a special solution or ordinary soap. To make a craft in this way, you must first lay out the wool, then apply the solution, and felt the wool using friction. Then the finished product dries, resulting in an unusual and very beautiful picture.

The classic wet felting technique involves the use of soap and hot water.
It is this type of felting that is most often used to create flat products, for example:
- Paintings;
- panel;
- Decoration of clothes and fabrics.
Dry felting is best suited for making toys, jewelry and various figurines. Of course, for different types felting will require a variety of materials. For a dry look, you will need to purchase wool directly, a special serif needle so that the wool can interlock with each other and create the desired texture. In another case, you will need to create or find a ready-made solution for felting.
Merino wool is the most popular and easy to use wool, it is often called combed tape. It may vary in its thickness and texture. At the same time, ordinary cotton wool, wool for stuffing, making crafts from felt, as well as synthetic winterizer, sliver, silk and other decorative threads for decoration are also suitable for felting. Ordinary yarn will not work, like ordinary threads, only wool is needed.
Dry felting paintings: master class
To create a unique picture with your own hands, you will need not so many tools and materials. For beginners, the dry felting master class by Nadezhda Ganyukova looks simple.
Namely:
- The first step is to purchase a special needle;
- Then prepare the wool of various colors;
- Take foam rubber of medium thickness;
- Choose a picture and get to work.

The dry felting method produces more voluminous products, and the colors remain bright and uniform.
Merino wool or carded wool is best for creating a picture. Needles can be both with triangular and star-shaped notches. The order of work is simple. The wool is superimposed on a piece of foam rubber, take a needle and start tangling the wool with it, you can make a substrate from a synthetic winterizer, and then cover it with wool. As you work, you can change the needle to a thicker or thinner one to work out certain details. Also change coat color. You should know some of the nuances while working with wool and a needle. The felting needle is very sharp, so you need to work very carefully and carefully and hold the tool at a right angle to the craft.
If, as you work, it is clear that there is not enough wool, you can add more and hide the flaws in this way.
Dry felting makes toys better than paintings, they look too clear, sharp, it is ideal to use wet felting to create canvases.
Wet felting from wool paintings: stages
Another type of felting is wet felting, which is felting with a soap solution or ordinary liquid soap. Gauze is also used, on which wool is laid according to the pattern. As a fixing solution, you can use the finished composition.
The composition can be prepared with your own hands at home according to a specific recipe.
2 pieces of any soap are rubbed on a grater, the finished shavings must be poured with a couple of liters of boiling water and mixed well, left for 1-2 hours so that the mixture becomes thick enough. After that, you need to prepare a place where the work will be performed. Suitable for any flat surface, be it a table or the floor. It is better to put something under the future picture.

With the help of wet felting, modern and unique works are obtained, which will be a wonderful gift for relatives and friends.
Stages:
- You need to put gauze on the surface, and on it - the base and the necessary pattern.
- Wool lay out in the form of a cross and stripes, you need to avoid holes and bald spots, the layers should lie at right angles to each other, and also have the same thickness.
- You should lay out the base first, then the background and the drawing itself.
- When there is already an idea of the future picture, and the blank has already been laid out, the wool is sprinkled with water, covered with a thin cloth, preferably nylon, and liberally smeared with a soapy composition. Excess should be blotted with a napkin.
- And finally, directly felting - the wet method consists in using friction from side to side to create the desired texture and volume of wool.
You can also felt wool in machine technology using a washing machine, but this method is not very convenient. In the end, you can create a lot of paintings and canvases that are very different in their color schemes and techniques.
Sets for beautiful felting paintings
If you have no experience in buying wool for felting, you can come to any needlework store and pick up a kit already assembled by professionals for making a variety of paintings. The main advantage of this type of creativity is the inability to get dirty - after all, to create a product, you only need wool and a needle or soap, depending on the chosen style of work. Ready-made kits may include different volumes of wool, needles of various sizes, a special solution for wet equipment.
The advantage of ready-made kits is that after creating one picture, the needles and composition remain, and you can work with them more than once, so after the first picture it is not necessary to purchase a set again - you can try to pick up the wool yourself.

Felting kits are best suited for beginners, because few people can immediately come up with ideas for future work.
Manufacturers of goods for needlework came up with drawings of different degrees of complexity. For example, nature and the sky are the simplest and ideal for beginners, animals and flowers (cat, poppies, bullfinch) are more difficult and better suited for already experienced craftsmen, people and reproductions famous paintings– it is necessary to choose already professionals of business.
Sets usually include:
- Sheep wool dyed, the number of colors depends on the pattern;
- Wooden frame for the finished product;
- The lining is fabric.
Wet felting paintings (video)
Each set comes with step by step instructions. Wool and tools after work can remain, which allows them to be reused. However, dry felting is not suitable for children - working with a needle is very dangerous for children. small child. The resulting paintings will please creative individuals and will be a wonderful decoration for your home.
Original wool paintings are a type of creativity that is rapidly gaining popularity. This hobby does not require large financial costs. His skills are fairly easy to learn. Used for development fine motor skills, imagination and fantasies in children. Moreover, in this lesson a short time you can go from a beginner artist to a real master.
In order to create landscapes and paintings of other genres from wool, very little is initially needed. Some of the tools and consumables are likely to be found at home, and everything that is missing can be bought even in non-specialized stores. At the same time, the first set will be useful in the future, you only need to add the elements necessary for new products. To start drawing you will need:
- Frame. You can do it yourself, but at the beginning of needlework experiments, it is better to purchase a finished one. It is quite suitable, for example, photographic. Its size is not so important, but for the first time you should not focus on large parameters.
- Viscose fabric. It will become the basis on which the craft material will be located. The size is determined by the frame parameters. Instead of viscose, you can take interlining.
- Manicure tweezers. It is necessary to accommodate small particles of wool, as well as to trim small details.
- Stationery clips of small size for fixing. Regular staples will work too.
- Scissors. Some experts advise using manicure. In fact, there are two requirements for this tool - not too many big size and good cutting edge. If a child is involved in the process of creating a picture, the scissors should be safe for him (for example, have rounded tips). Adults can use a clerical knife.
- Glue. Glue stick works best. His dry trace will be invisible on the work. With the acquisition of experience, other types of glue can be used.
- Iron. Well, if it will have different modes.
- A blank sheet of paper (for laying between the pattern and the iron).
- Soap, felt, silk, hairspray (as needed and optional) and, of course, wool.
In advance, you need to prepare a sample according to which the picture will be created. On the initial stage classes, you should not chase complexity and variety, it is best to choose a simple image.
Wool selection
The technology of felting (that is, felting wool) allows you to create not only paintings, but also toys, clothes, and various decorative accessories. There have always been certain requirements for the main material here. Attention to the selection of wool must also be approached at the initial stage of learning the secrets of art. The following types of wool are good for painting:


It is believed that only a natural product is able to fall off perfectly.(that is, turn into felt). But at the initial stage, you should not think too much about this. It is enough to choose wool by colors so that it matches the features of the future picture. You can just get by with those grandmother's balls that were lying around at home.
Stages of work
Now it’s easy to find a master class on wool paintings. With your own hands, with its help, you can create quite high-quality works. The basic rules of creativity are quite easy to learn. They will come in handy in the future when working on more complex compositions. These rules are:

Not only light paintings from wool are created in a similar way. For beginners, of course, simplicity and accessibility of technologies are important. It should be remembered that the basic principles of creativity itself are the same here as in ordinary drawing, only paints on paper or canvas are not the carrier of color.

The first steps
The felt pattern is created in layers. Strands of different colors gradually form the overall picture. Wool is a pretty handy consumable. Thanks to this, even the first work can look amazingly beautiful. Fortunately, there are convenient sketches that do not exclude the author's imagination when using.
common flower
A classic flower can be the first wool painting for beginners. The master class on its creation is almost the simplest. For the main background and petals, you need light yellow and white wool. You will also need green (for grass, stem, leaves). Here is the process itself (excluding preparatory work):

A flower can do Small child. But the control and prompts of an adult are still necessary.
light landscape
To get comfortable in a new kind of creativity, you need to perform a few more simple works. For example, wool painting workshops offer step-by-step creation various options light scenery. For autumn, in particular, you will need to take the Trinity (or similar) wool. Colors: green, burgundy, yellow, orange, red, brown, white. Landscape instructions:

Painting landscapes is easy. In addition, there is plenty of room for imagination here. Working on them will not only allow you to learn the basics of art in practice, but also teach you how to correct shortcomings, give confidence that it will come in handy when creating more complex compositions.
From simple to complex
This path has been traveled and is now widely famous artists(for example, Nina Mazyreva). As an employee of a rehabilitation center for children and adolescents with handicapped, the woman was looking for new forms of work with them. And now a lot of people come to her exhibitions.
Morning in the winter forest
Experts believe that the works of Nina Mazyreva breathe real life. great heights she achieved precisely in the depiction of wildlife, working in the style of watercolor. She also teaches craftsmanship. On their basis, students successfully advance in their work, developing the ideas of the master. Each artist brings something different to the theme. And watercolor is gaining popularity. Here one of the options for a step-by-step master class on paintings from woolen watercolors:

Felting paintings from wool, thanks to the effect that the multi-layered texture gives, allows you to achieve the depth of the image. Nature looks really alive on them.
Beautiful Kitty-Kotofey
In woolen art, any movement of the brush with paint replaces the application of threads. But perseverance and slowness make it possible to achieve high artistry even in difficult images. good example there may be drawings of animals. Here's how to make a cat:


This the simplest instruction easily complemented by other items. You can, for example, use a little silk, which will give the picture an additional light effect.
The initial technique implies that you always need to keep a sketch in front of your eyes. Do not rush to complete the first work. It is better to do them in several stages. But you can become a real master quickly enough. There are no strict requirements here, so a rich imagination gives the key to the loudest success.
Do you love to draw? Then the time has come to try a new direction for creativity - dry felting from wool. Having mastered this technique, you can make real masterpieces and create your own art collection. Wool painting by simple master class for beginners - good way master .
Step-by-step master class: painting from wool
Before you begin, prepare the following materials:
- Frame with glass and clips
- Wool of different colors
- Base fabric - interlining or flannel
- Tweezers
First you need to disassemble the frame, that is, separate the glass from it and fix the selected backing fabric on a wooden base. This fabric is needed in order for the coat to hold well.

Now you need to take the undyed wool and lay it out in an even layer on top of the frame.

At this stage, the base layer is formed, so gently pull the threads with tweezers to get even strands. You can do this with your hands, holding a piece of wool in one, and pulling strands with the other.

Photo of pulling technique
The plucking technique is to be used in order to form the background of the wool pattern for beginners. This technique is quite simple: bend a piece of wool and pull off the hairs from it and lay them out on the work surface.

Photo of pinching technique
For the background of the painting, use blue and blue wool, combining plucking techniques.

Now you need to make a light haze on a blue background, for this use gray or beige wool. Lay out thin strands. We'll have winter picture, therefore, strands for snowdrifts were obtained from white wool by pulling and lay them on the base.

White wool is suitable for decorating the moon and light haze around it. Unlike snowdrifts, locks for the moon should be smaller. Around the moon, you can add a little yellowness. To do this, use wool of a suitable color, but after pulling the hairs, cut off to make the effect more real.

With the help of white wool, you can draw trees that can be seen in the distance. Gently adjust the threads with tweezers to bring the picture closer to the natural image. If you find it difficult to create on the go, then first make sketches on paper and even mark the shades so that it is easy to select them from the available wool.

Brown threads will be useful to you in order to make a hut, which is barely visible due to snowdrifts. If you want to plant a wool tree, then mix several shades of threads, cut them a little, and then lay out the branches.

From above, spruce can be covered with snow using white wool. The plot can be deeply thought out, then from the moon the glare will fall on the path, and besides the spruce in your picture, trees will grow from the wool.